.: Under Seat Storage Bins
Once again Audi has left the North America market wanting these little items that where not available here. Luckily you can get all of these parts through your local dealer (I ordered mine through a dealer here in Canada without issue).
These are not large bins and can not hold large items. It's always handy to have a bit of extra space though. These bins are big enough to hold an umbrella and a few extra items per side. Perhaps a flashlight and some emergency gear?
I did take a few quick measurements. These numbers are conservative and estimated only, you may have 1/4-3/4 of an inch variance because I wasn't sure the exact place to measure. Length 11", width 2", height 2 1/2".
Now this is a no modification install so I would rate it 2 out of 10 for difficulty.
Here is what you are going to need to complete both sides. These bins worked on both the passenger side and driver side with driver side memory seats (both seats power).
QTY Part Number Description:
4 - N 907 371 05 - Screws (2 per side)
4 - N 900 880 03 - Speed Nuts (2 per side)
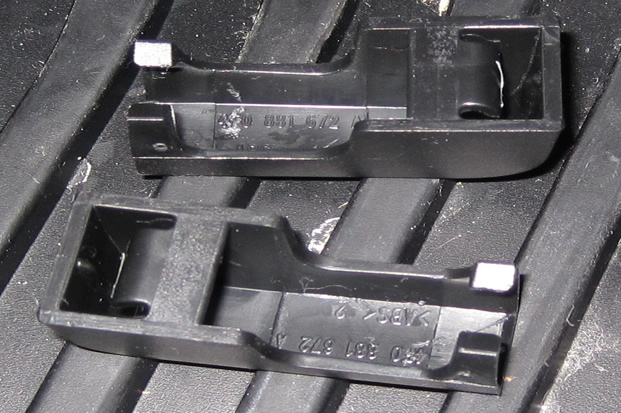
2 - 8K0 882 601 C xxx - Storage Bins (1 Per side )
x - 4F0 881 672 A 01C (black) This is optional. I broke one taking it off of the seat bolt so you may want to order one or two when you get everything else. They are really cheap so use your best judgment. If your close to the dealer don't worry about it. If you have to order via phone and internet like myself, you may want to order some.
You will note I left the last 3 digits of the bins as xxx they change depending on colour.
Here are the colour codes:
4PK - Soul (Black)
61S - Luxor Beige
J50 - Light Gray
K38 - Cardamom Beige
A5:
I can not confirm the A5 information100% so please consult with your dealers. These part numbers where correct when I ordered them for the A4.
Prior to 07/07 use 8K0 882 601 A xxx
After 07/07 use
8K0 882 601 C xxx (same as A4)
4PK - Soul (Black)
Y22 - Light Beige
J50 - Light Gray
M90 - Stone Blue
Z99 - Cinnamon brown
Z62 - Star Silver
K38 - Cardamom Beige
S96 - Mustang Brown
Z95 Pearl Silver
So if you had a black interior like me the part number you would order is 8K0 882 601 C 4PK.
*Note. Not to confuse the issue but there is a different part number that some believe is for the sport seat. I do not see anything that would prevent the ones I list from working on both. I would recommend you talk to your dealer when ordering these if you have sport seats and mention part number 8K0 882 601 B xxx. If they don't believe there is a difference then go with the original part numbers I list (they are bigger).
The tools you will need:
1 - Something to kneel on while working on the seats
1 - 3/8 Socket driver
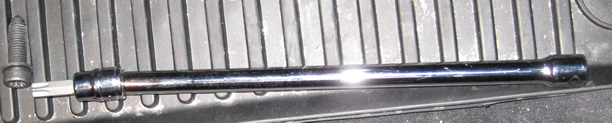
1 - Very long socket extension (optional)
1 - Torxs T50 Socket
1 - Torxs T30 Screwdriver with extensions
1 - Mini slot screwdriver
(The mini screwdriver is used to help pop off the black covers over the front bolts so you can use what ever you want for that).
The reason the long extension is optional is because you can use it to unscrew the bolts by hand once you loosen them. The bolts once loosened spin really easy and can be a pain to unscrew without an extension or something to hold onto.
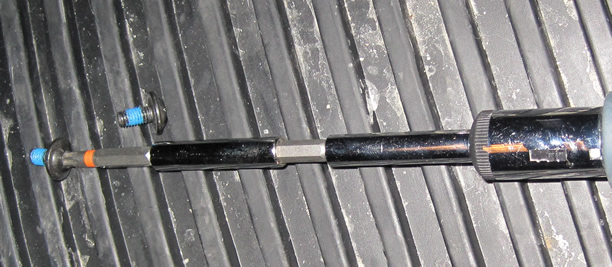
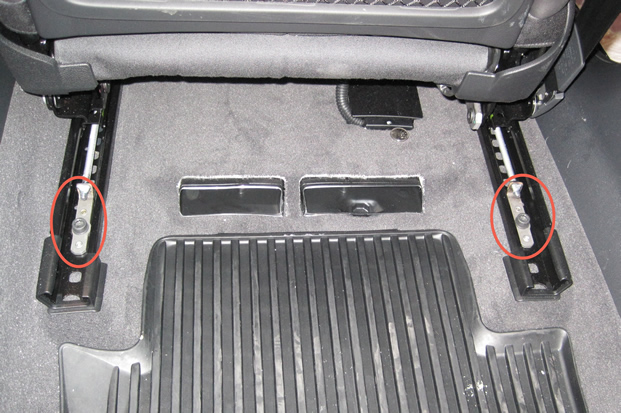
Step one is to pop the covers off of the bolts on the front rails of the seat. There aren't any on the rear just 2 per seat.
Here are some shots of them off so you can understand how they clip on. I don't know if there is a right or wrong way to remove them. They seem to just snap on and snap off.
Once you get the caps off put the seat forward and remove the two rear bolts:
Once removed put the seat all the way back and remove the two front bolts and tile the seat back:
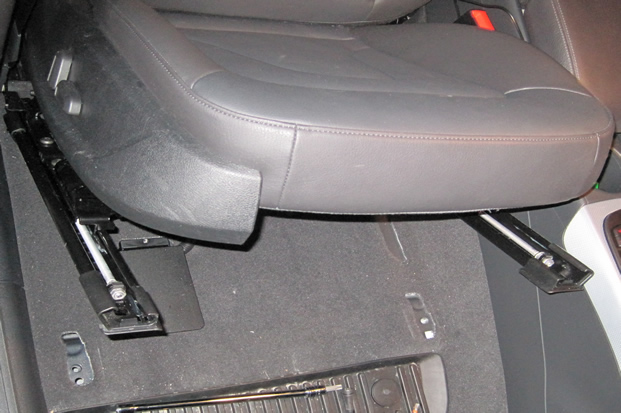
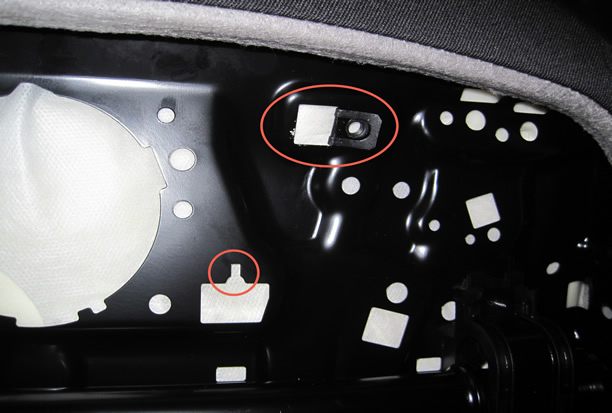
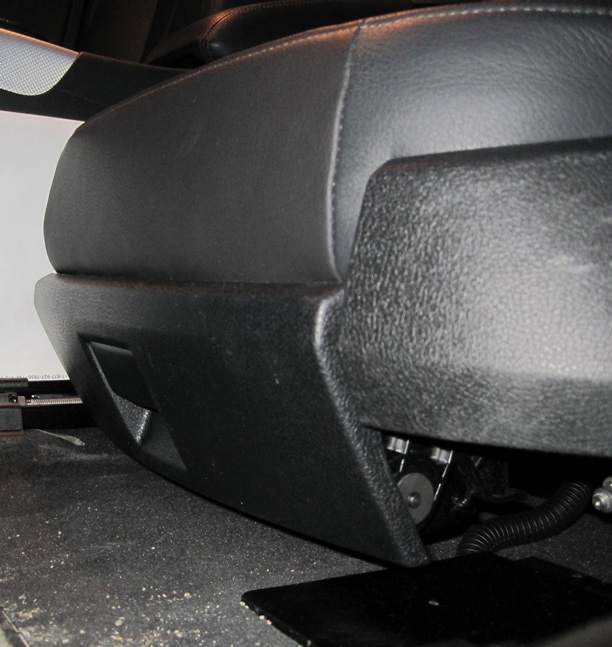
Once you have the seat tilted forward the bottom will look like this, keeping in mind that the drivers seat looks a bit different because of the memory module:
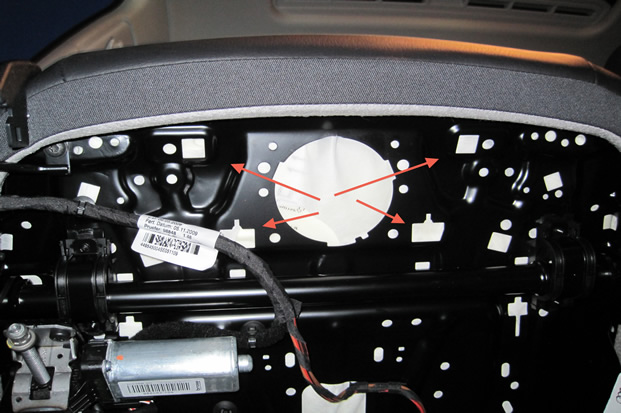
The two top holes are where the speed nuts go. The two lower are keyed so that the bins slide forward and lock in place:
Left:
Right:
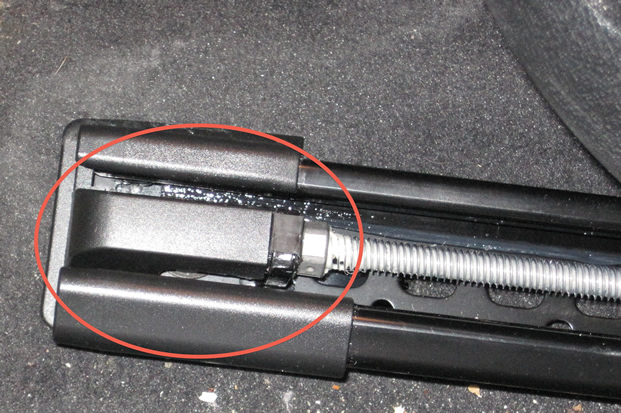
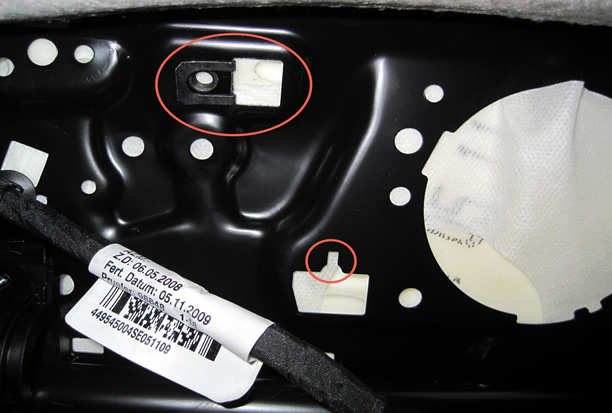
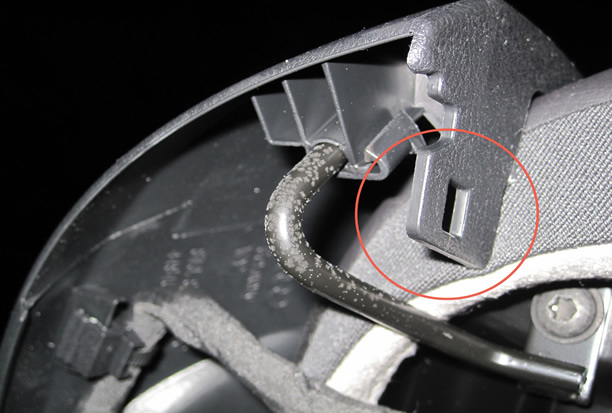
OK now that you have that done you need to note there are 5 mounting points per seat. The two speed nuts, two keyed holes as shown above and one clip that is built into the trim on the seat. You will notice the bins are made for a clip on each side. There is however only one per seat so I guess they do this so they can use the same part on the driver and passenger side:
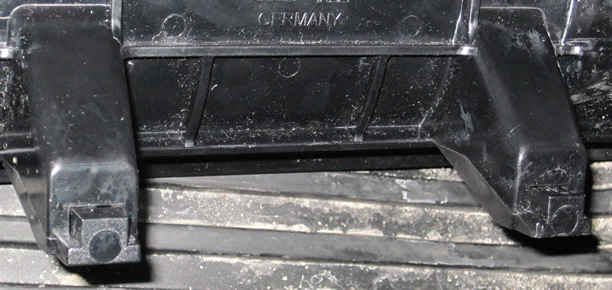
These aren't the best pictures but here are the two posts that are keyed:

Basically take the bin and slide it into the two keyed slots and pull forward. That will put them in place. Now push up and clip the bin into the trim. Now come the real PITA!!. Getting the two screws in place. You pretty well do this blind. To get to the screw holes you have to open the bin and slide the screw driver up in the gap between the lid and bin to get the screw in place. A magnetic screwdriver will make life easier.
If you get lucky you may hit it first try. If you can get your head in place with a flash light you may be able to confirm its all lined up before you try and get the screw in. That's what I did at least.
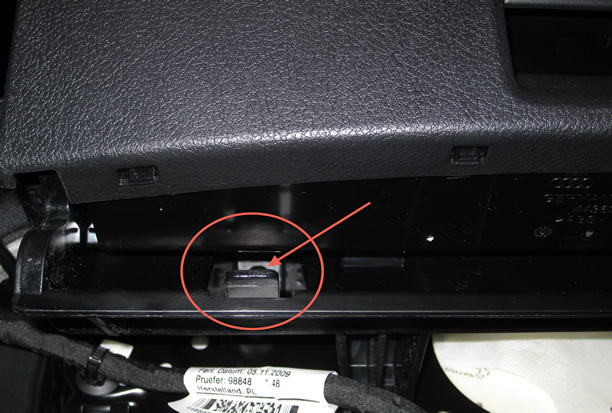
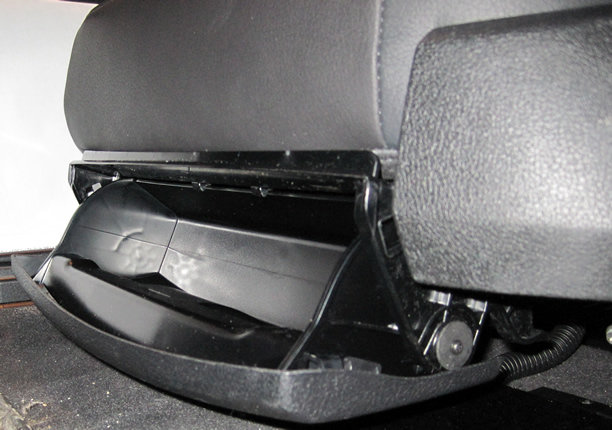
Once you get the two screws in it should look like this:
Open:
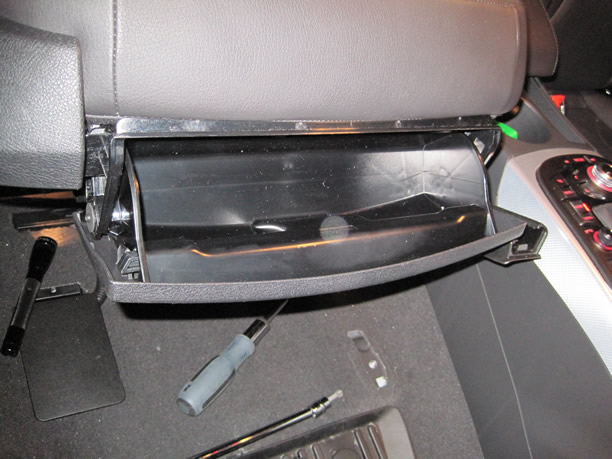
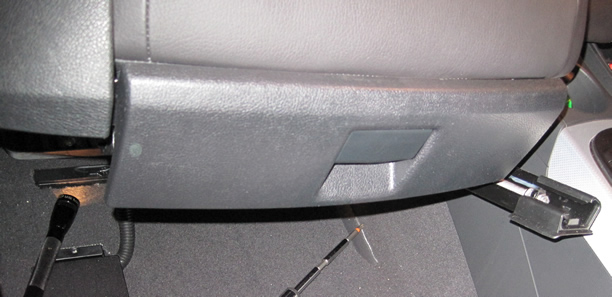
Closed:
Now put the seat back down and bolt it down. Put the two in on the front but DO NOT TIGHTEN all the way. You have to leave some room for movement so you can get the back ones in place.
So:
Put the two front bolts in place and leave a quarter turn loose
Put seat forward and put the two rear bolts in and tighten
Put seat back all the way and tighten the two front bolts the rest of the way.
Slide on the two bolt covers and repeat procedure on other side or car from start to finish for the next bin.
Once both sides are done enjoy your new bins.
Drivers Side:
Closed:
Open:
Please note: AudiEnthusiast.com is in no way associated to Audi or VW in any way shape or form. All brand names and manufacturers listed here are for informational purposes only and are in no way endorsed by AudiEnthusiasts.com unless stated other wise.
WARNING!! All modifications and changes are done at your own risk. This site in no way approves the modifications performed here for your vehicle. Please check with your dealer before performing any changes as they may void portions of your factory warranty.