.: Audi Drive Select (ADS)
This is an optional step. For MMI users you have control through the Drive select menu, however for non MMI cars this will be the only way to change settings without using VCDS.
Page 3 Installing ADS Buttons continued:
The line that goes to the Central Electric (J519) control module has to be spliced in. There is no way around this one. There is already a pin in the plug and the purple wire you are connecting to is part of a lin bus system which is a slower network than the CAN BUS but works the same way. Multiple items can connect to the same wire.
This may not be helpful but some of the other items on the same line are:
Garage Door Opener
Seat vent control unit (I wish)
If gaining access to one of those works for you then you can always tap into those. But for the purposes of this DIY I will tap the line near the module.
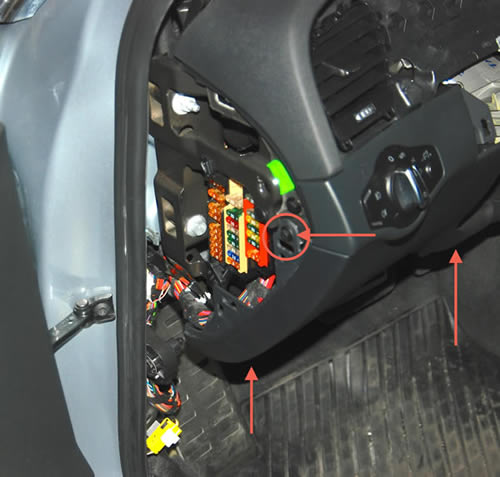
First step is to remove the dash panel on the drivers side. Start by removing the fuse cover panel.
Then remove the bolt inside the fuse panel and the two at the bottom of the panel:
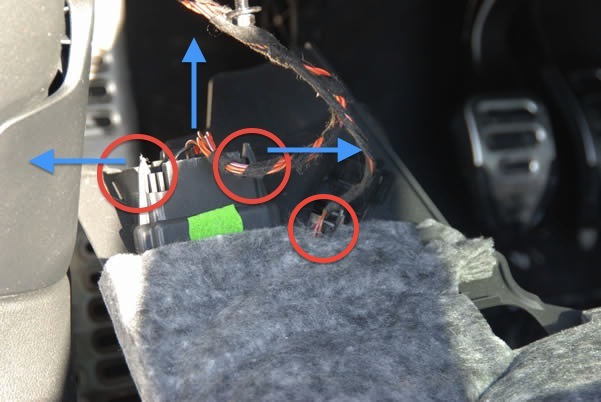
Once you undo the bolts and lower the panel you need to release the plug for the under dash light and the OBD connector. The plug on the light just has a little tab to push down to release. The ODB connector you have to spread 2 clasps apart to release the plug. (If you scroll to the bottom of the page where the grounds are you can see these plugs hanging loose)
For better access to the module press down the tab on top of the relay holder in front of the control unit, pull it out of the way. It comes out quite easily.
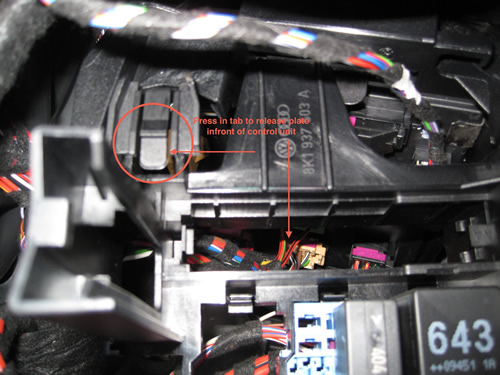
With the relay panel moved the module is visible and access to the module plug needed.
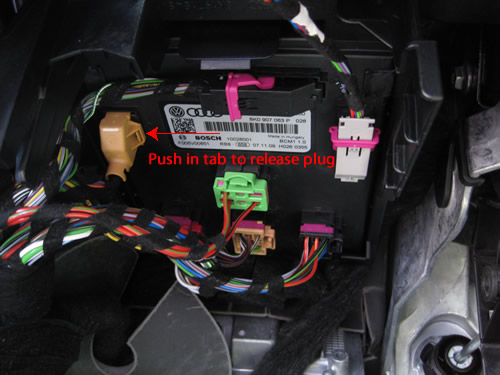
Press down the retaining tab and remove the plug.
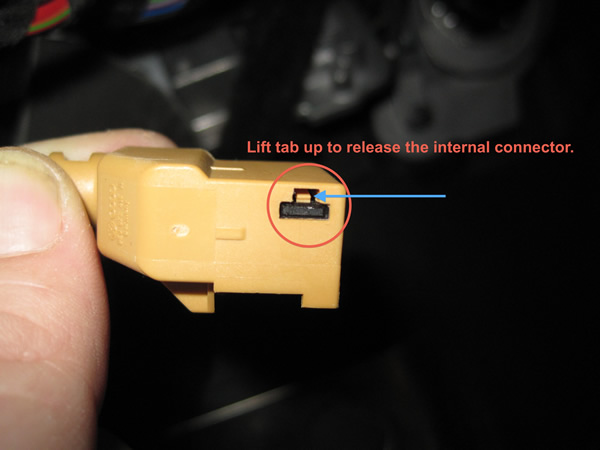
To Release the internal holder slide a small screw driver or anything you may have thin enough to release the tab. Once inserted simply pull the internal connector out.
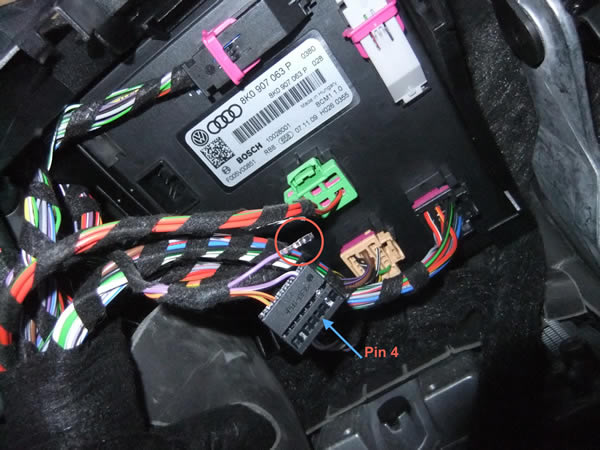
As mentioned this wire is spliced. Even from factory this isn't designed to plug in anywhere. There is actually a splice point in the main harness but I don't think splitting that huge mass of wires is a good idea. Here is a picture of the plug apart and wire 4 removed. I then unwrapped the tape to give some room to splice the wire. The reason I removed the pin was so I could solder the connection then slide heat shrink tubing over the splice. It's up to you how you perform this step though. I'm sure a lot of people will just use those blue wire taps available from Radio Shack.
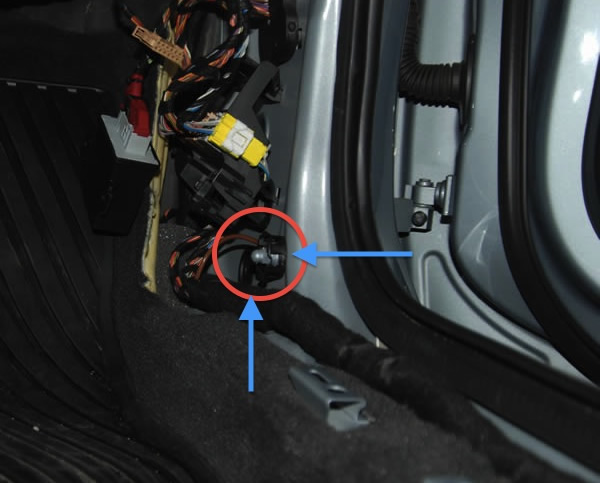
Once you have your Lin Bus wire connected your down to the ground. Now you could tap that into another wire or you can run a new one. If you ordered an eyelet wire from the first page then your all set. There is a ground point on the drivers and passenger side behind the side kick panel. Since your running wires to both sides you have a choice of which side your going. I think you may find the passenger side ground easier to get to.
You have to remove a 10mm nut to get to the ground. Here is the ground on the passenger side:
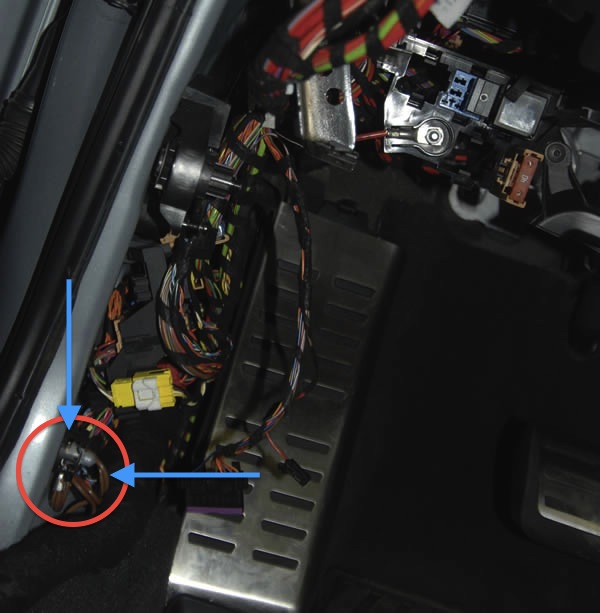
Drivers side ground just in case:
The final step will be to actually install the switches. Well cover that in the next page.
Please note: AudiEnthusiast.com is in no way associated to Audi or VW in any way shape or form. All brand names and manufacturers listed here are for informational purposes only and are in no way endorsed by AudiEnthusiasts.com unless stated other wise.
WARNING!! All modifications and changes are done at your own risk. This site in no way approves the modifications performed here for your vehicle. Please check with your dealer before performing any changes as they may void portions of your factory warranty.