.: Trunk Accessory Plug
Once again Audi has left the North America market wanting these little items that where not available here. Luckily you can get all of these parts through your local dealer (I ordered mine through a dealer here in Canada without issue).
This project is for the installation of the 12Volt accessory plug in the trunk of the car. If your like me you already have a cigarette lighter, one in the centre console, one in the back of the rear consol and now one in the trunk. Yeah I think that should do it.
Why would you want this? Who knows, maybe to power that nifty tire pump that you installed after reading one of my other projects.
This is a fairly easy modification so I would rate it 4 out of 10 for difficulty.
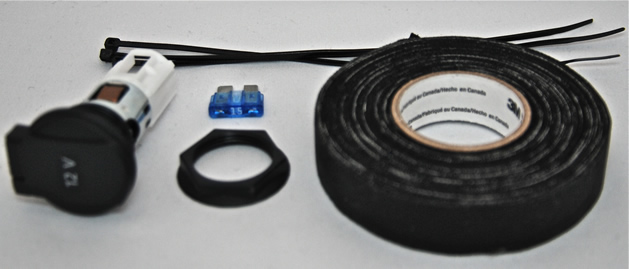
Here is what you are going to need to complete the install. This install is for the sedan but the avant is almost identical except the plug gets mounted up higher on the side and not on the bottom.
QTY Part Number Description:
1 - 8E0 919 309 - Accessory Socket
1 - 8E0 919 341- Spring Loaded Cover
** Above part for sedan only. For Avant order 7L6 919 341 F
1 - 1J0 919 321 - Electrical plug (for accessory outlet)
2 - 000 979 227 E- Wires for plug and fuse holder
1 - 000 979 230 E - xxx - Wire with eyelet for ground (never ordered please verify with dealer)
*This part's optional. You can easily put your own eyelet on or splice into existing ground wire.
1 - 15 Amp Fuse (Blue)
Black Friction Tape to make a nice neat harness when your done
2-3 small black tye wraps to secure your wires.
The tools you will need:
1 - 10 mm socket and extension
1 - Box Cutter
1 - Black Sharpie Marker
1 - Adjustable Wrench (to tighten big plastic nut on the back of the accessory outlet)
The Install
When I did this install I had the side panel removed. Although that is one way to do the install, after completing it I'm fairly sure you can complete the install without removing the panel. this makes the install a fairly easy one. I had to remove mine for the installation of the wiring for the new rear heated seats that I retrofitted (DIY coming soon).
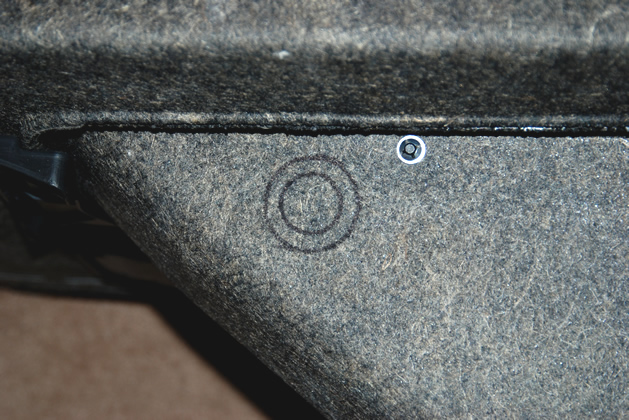
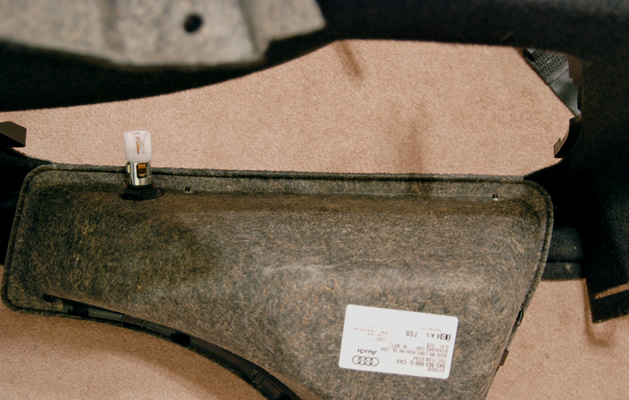
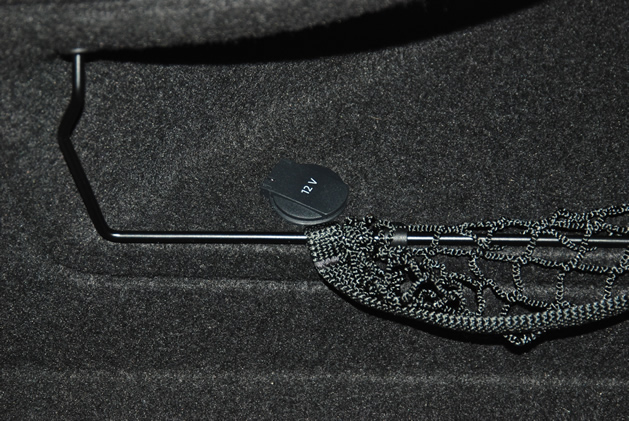
First step is to outline where your going to cut. This is best done with a sharpie. Now when I did mine it was out so doing it installed you may have to be a bit more creative with your markings. As you can see with my picture I circled the inside of the nut and outside so I knew where my tolerances where for cutting out the hole.
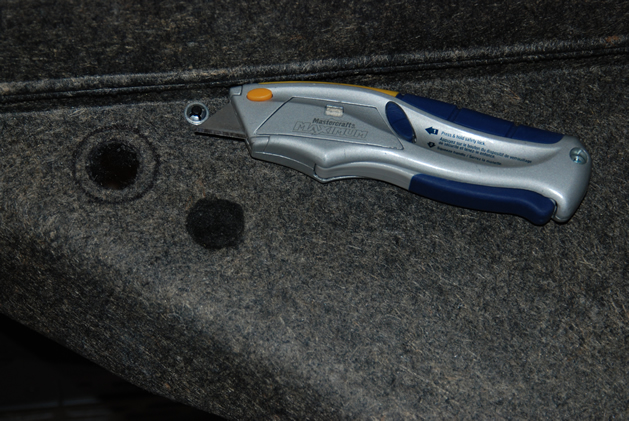
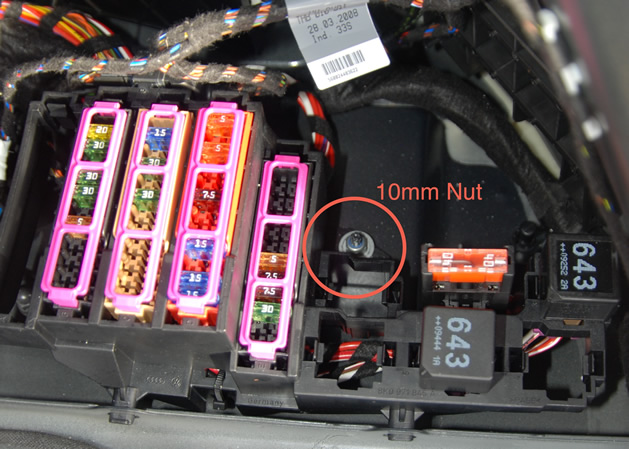
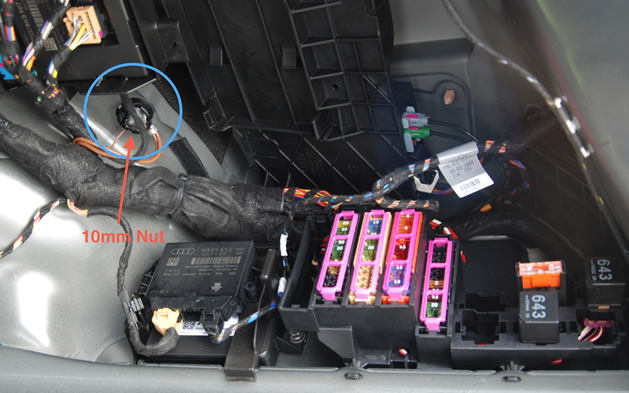
Remove the 10mm nut that holds down the fuse panel assembly. Once this is removed the entire panel comes out moving towards the fender. It slides right out you wont have a problem figure this one out.
Once the panel has been released it's fairly easy to move around. There is lots of play. Release fuse block by pushing in release clip and pushing down on fuse block. It will swing right out.
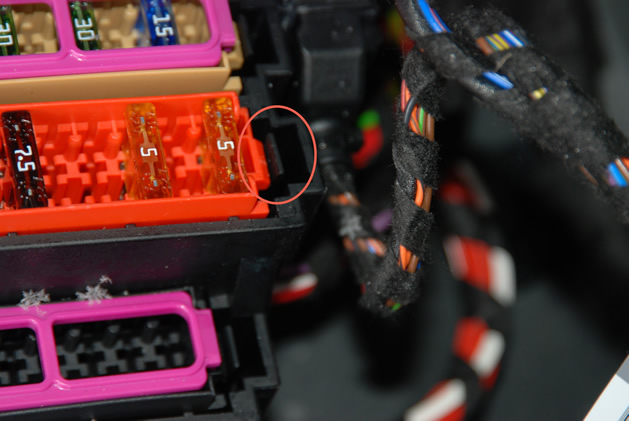
The next step is to remove the black cover off of the back of the fuse block. It's fairly easy. Just release the 3 tabs shown in the picture and the cover swings right off.

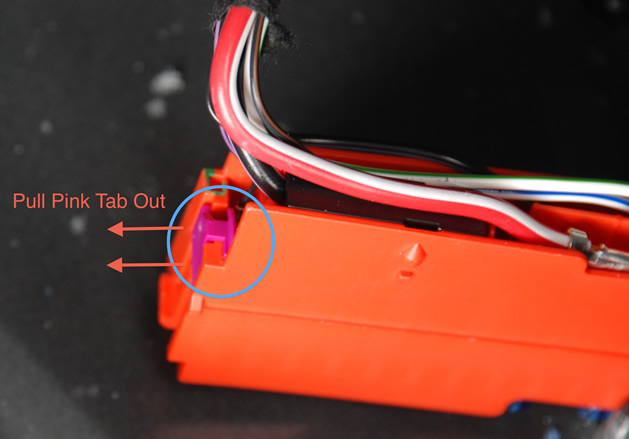
Before you can insert your new wire into the fuse block you have to release the retaining lock that holds all the wires into the block. It only moves about 1/4" so don't try and pull it right out. If for whatever reason your having a hard time getting to the tab that way you can use a small screw driver and push it in from the opposite side.
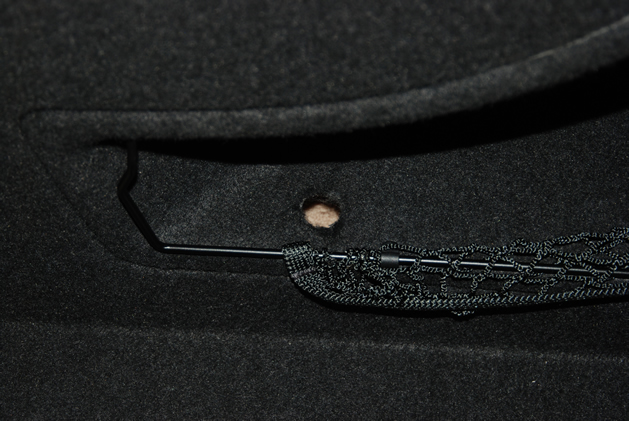
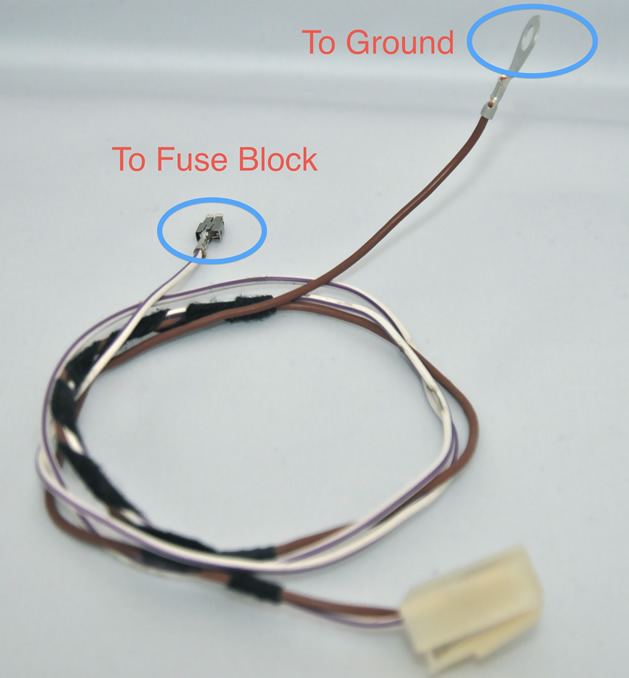
Your harness will not look exactly like this as I have an entire spare harness and just removed mine from it. So other than colours your should be similar. The wire that goes into the plug has the exact same end as the fuse block so it's just a matter of lengthening the wire a bit. Figure out the route your going to take to the fuse block first. Keeping in mid some slack in the wire to open and close the compartment.
For the ground you have a few options. You can order the factory end for a small fortune or you can put your own eyelet on or even just tap a ground wire that is already there. You can choose which ever method works best for your situation.
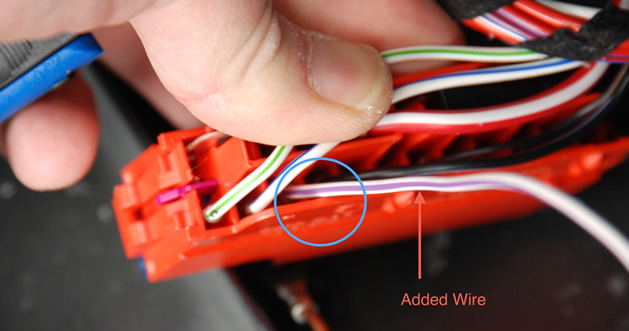
Now insert your new wire into the fuse block. It doesn't appear to have to go a specific way as both sides look identical. At least on my harness it did. The fuse goes into slot 3 fluse block 4. You can verify this in your owners manual. The proper designation for this is ST4 (red) SF3. There will be an opens spot and your wire colours should be the same as you see here making it easy to identify.
Now close the pink wire lock, put the black cover on and snap the fuse block back into the fuse block holder then put it back in place and tighten the 10mm nut back on.
Now for the ground
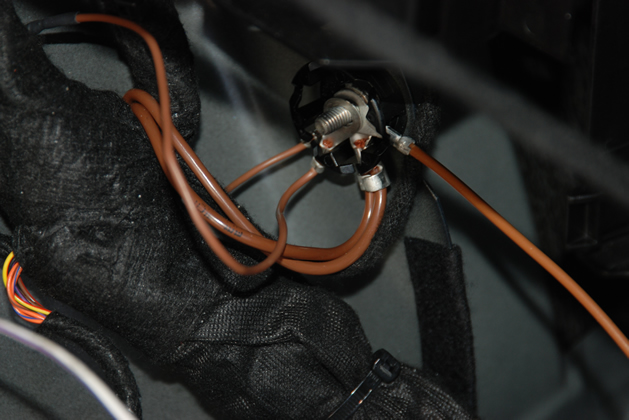
Remove the 10mm nut if your using an eyelet for your ground or splice into an existing ground. Although you can splice an existing wire I do recommend you take the time put an eyelet on and do the ground that way.
Once your ground is done your complete. Insert a 15amp fuse into slot 3 where the new wire was installed and plug the harness into your new accessory plug. Now your ready if you ever need to plug something in the trunk or charge something up while your going somewhere.
Please note: AudiEnthusiast.com is in no way associated to Audi or VW in any way shape or form. All brand names and manufacturers listed here are for informational purposes only and are in no way endorsed by AudiEnthusiasts.com unless stated other wise.
WARNING!! All modifications and changes are done at your own risk. This site in no way approves the modifications performed here for your vehicle. Please check with your dealer before performing any changes as they may void portions of your factory warranty.