.: Ambient Door Pocket Lighting
This page will review the full ambient lighting installation version.
Identify Your Door Module
The best way to tell if your module is compatible is to look. I have included a list of modules I could visually identify with the correct markings.
Note: I have not tested these so I can no guarantee them.
My front doors had compatible modules but I will list some I could visually check on eBay for reference. Since I did not test the Q7 modules for the front I will not include them. Keep in mind I did use the rears without issue.
Front:
Drivers Side (LHD and RHD) :
8K0 959 793
8K0 959 793 B
8K0 959 793 D
8K0 959 793 L
Passenger:
8K0 959 792
8K0 959 792 B
8K0 959 792 D
8K0 959 792 L
*There may be more but this is all I could confirm visually
Rear:
Here is a list for the rear modules. Note that I have used a Q7 module based on the fact that it had the same software revision. Use non A4 modules at your own risk. Just because I was successful doesn't mean I guarantee it will work for you.
Q7 Modules:
Left and Right:
4F0959795M
B8 Modules:
Left:
8K0959795
RIght:
8K0959794
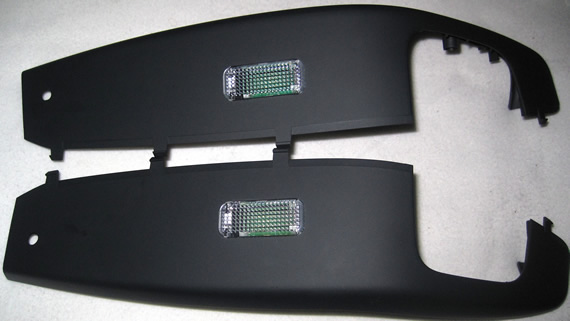
How to tell Visually.
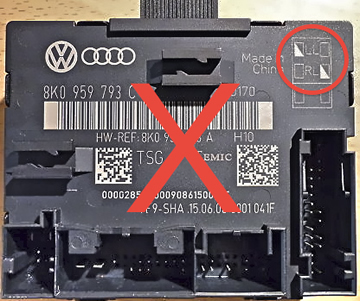
If your module only has half of the boxes shaded per the picture below your module will not be capable of the ambient lighting and will need to be replaced. To give you an idea I paid approx $100 with shipping to get a replacement set.
Here is an example of some modules:
If your module only has half of the boxes shaded per the picture below your module will not be capable of the ambient lighting and will need to be replaced.
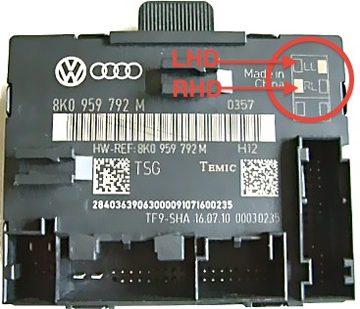
Here is an example of a compatible module:
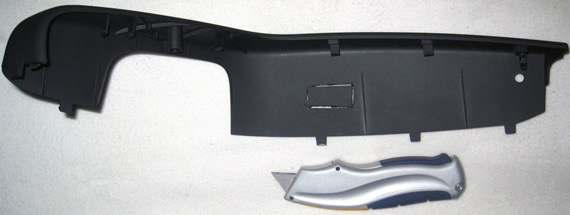
Installing the Lights:
To install the new LED lights from Audi you will need to do some cutting. Make sure you test fit the location you are putting the lights. I tapped the backing of the light to the panel then test fitted it to make sure there would be no clearance issues when I reassembled the door.
First step is to approximate where you want the light to be and where it can be mounted without hitting any door skin parts. Although you can do some modifications to the door panel to give you more options for mounting the light I chose to work with what I had. Once I had an idea of where the light would fit I taped down the light backing to the panel and checked for clearance.
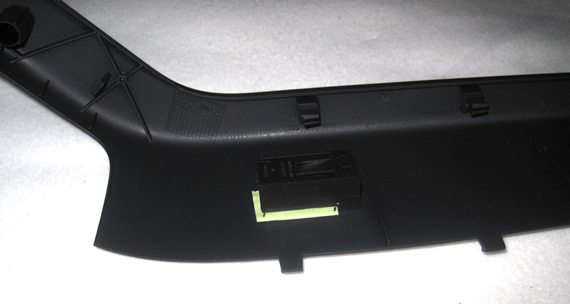
Once you have the light placed where you want it and the fitting has been verified you need to trace around the light so you know where to cut. The hole will need to be bigger than the backing shown because of the lens clips. I however chose to start with the backing size then enlarged as I needed. That way you don't end up with a hole to big.
Now there are two ways you can cut your hole, at least 2 ways that I tried. One is to use a dremel and the other is a sharp box cutter. Do not use a small exacto knife as you may brake the blade or slip and hurt yourself. I liked the box cutter method as it felt like I had more control than with the dremel.
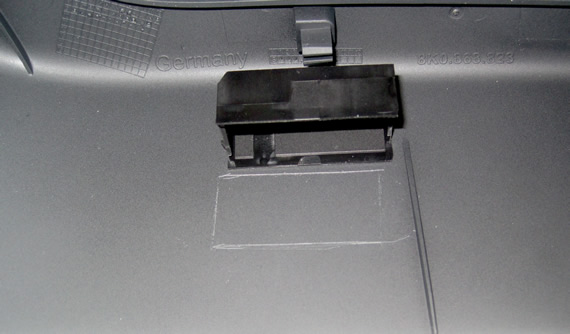
Once the hole is done you'll start to test fit your light and enlarge as needed until you get the assembly to fit through and be nice and tight.
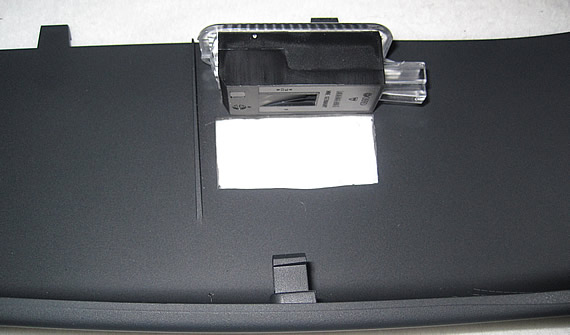
Here is the light fitted:
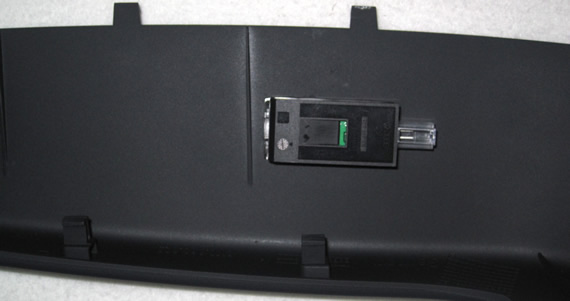
And Finally:
Repeat the process for the other doors. The drivers is the hardest due to the large handle and all the switches. So it will take a bit of fitting to get your sweet spot.
Please note: AudiEnthusiast.com is in no way associated to Audi or VW in any way shape or form. All brand names and manufacturers listed here are for informational purposes only and are in no way endorsed by AudiEnthusiasts.com unless stated other wise.
WARNING!! All modifications and changes are done at your own risk. This site in no way approves the modifications performed here for your vehicle. Please check with your dealer before performing any changes as they may void portions of your factory warranty.