.: Upgrading to full Alarm
SURPRISE!! Audi cut the North American market short again. I can't tell you how long I looked for the alarm interior bypass button that I had got used to in MY B5!! What was Audi thinking.
So this project was to upgrade the factory North American alarm to the ROW alarm and include the sensor and over ride buttons. Over all the install isn't to difficult but it takes some careful measuring and a little bit of wiring. So lets move it along.
This is a fairly easy modification so I would rate it 4 out of 10 for difficulty.
There are only a few panels to remove. Now anyone that has followed my other installs knows I never splice when I can go to the factory connection points. Well...... This install is pretty well all splice for the alarm module with the exception of the power wire. If you wanted to take a short cut you could splice that wire as well but that's not how I do things. When I look at the fuse diagram for my car I know that where it says alarm I will find my alarm fuse.
There are three parts to the install. Install the alarm switch, install the alarm sensor module and mics and the coding.
First step for me at least was to get the door switch installed so lets start there.
Parts: 8K0 951 177 - Movement Detector
8T0 947 565 - Sensor Holder
8E0 971 832 - 4 Pin Connector housing
000 979 009 E x 2 Wires for Alarm Sensor plug
4E0 962 109 5PR - Door Switch Up to 05/10
4F0 962 109 B 6PS - Door Switch After 05/10
4F0 959 527 5PR - Mounting trim for Door Switch
8L0 972 980 10 Pin Connector for Switch
000 979 018 E x 5 wires for both alarm connectors and door.
T20 Torx Screwdriver
Small Slot Screwdriver
Medium Slot Screwdriver
Wire Cutters
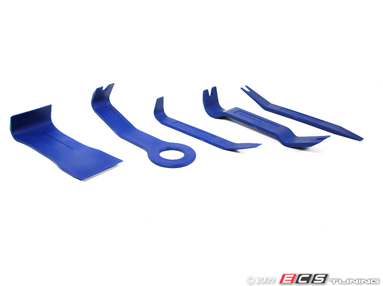
Trim Wedge Tools or Equivalent (optional)
Dremel with cutting blade or sharp box cutter.
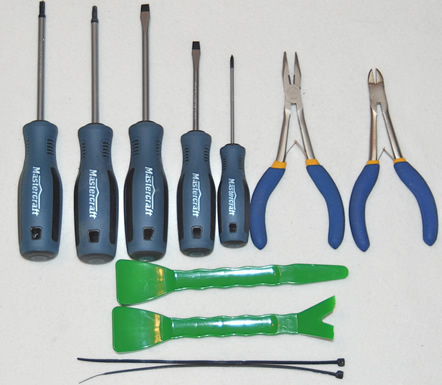
You may not need all of these tools or you may need more but this is a good start.
The trim tools are very handy but aren't necessary. I recommend you pick up a set from ECS Tuning though the next time they have them in stock. Their set is much better than what I have been using and cheaper. I know where I'm going for my next set. You can find them here.
The Install:
To start we need to remove the door panel. Now I think you can do this install with taping into the switches for the light source without removing the door panel completely but that isn't the install I am showing here. No matter what pulling the door panels off will make for an easier install regardless of the method you choose.
Remove door cover:
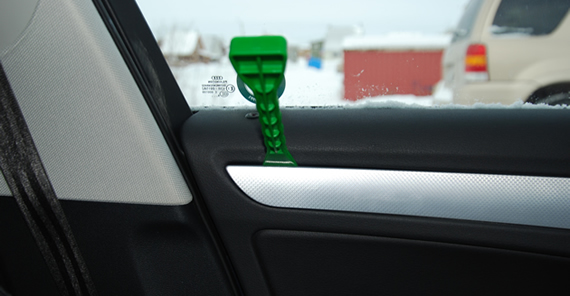
The first step is to remove the door decorative trim:
I used a trim removal tool to start but any thin item you can slide behind the trim will work including a slot screwdriver, just be careful not to damage your door.
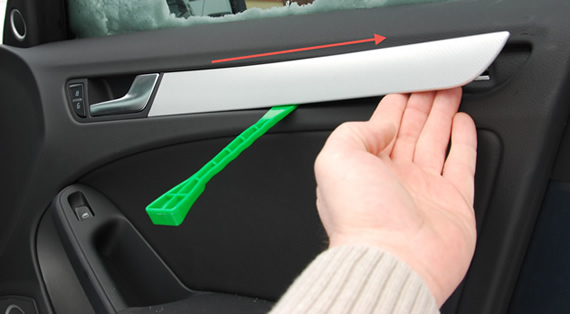
Once you have popped the first clip you can use your hand to pop up the rest of the trim. The trim removes towards the outside of the door once it's unclipped. It slide under the door handle slightly so don't just pull it straight out. There are also direction clips that hold the trim in place as you can see by the last trim picture.
There are 3 push in clips, 2 hooks and the slide in tabs in the end.

The next step is to remove the black trim that attaches directly below the door handle/switches.
There is a small hole in the trim near the outer edge. Using Audi's instructions you are to put a screwdriver in the hole and pry the trim off. Once the end is popped off you can just pull the rest of the trim off by hand. You have to start at the door edge because of the way the clips go on or you will damage them. Not to worry it's not a delicate part just don't go against the instructions.
Place a screwdriver up into the hole vertically and pull straight towards yourself.
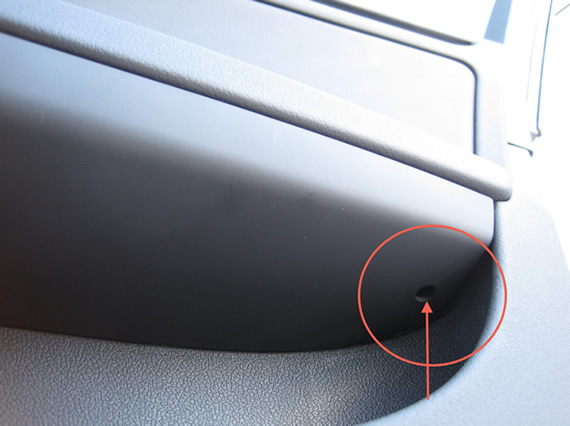
As you can see by the picture below there is only one real clip, the rest are just little plastic burs that will pull out fairly easily once the main clip has been pulled out. This part comes out real quick. As you can see by the picture below there are lots of points that this trim attaches but over all the part is secured by using lots of points not large tight clips.
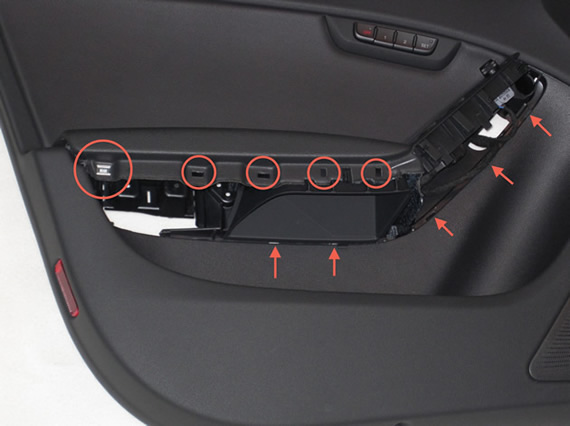
Once the lower trim is removed you need to remove 5 T20 screws before unclipping the door panel from the door. I'm sorry I don't have a great picture showing the screw locations but this should be more than enough for you to find them.
2 Under Top Trim
2 Under lower Trim
1 at the very bottom of the panel not covered
Rear of panel showing all screw locations
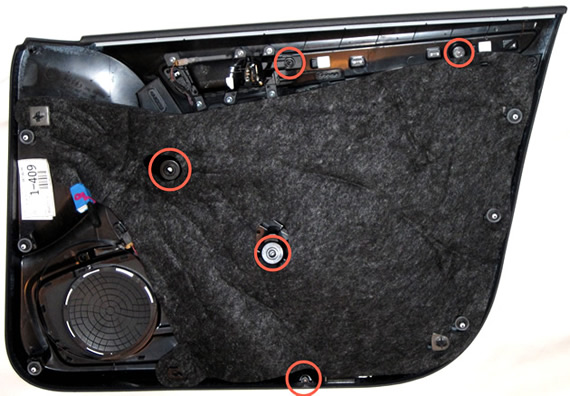
Now that the screws are undone your next step is to unclip the panel from the door. There are 7 clips in total.
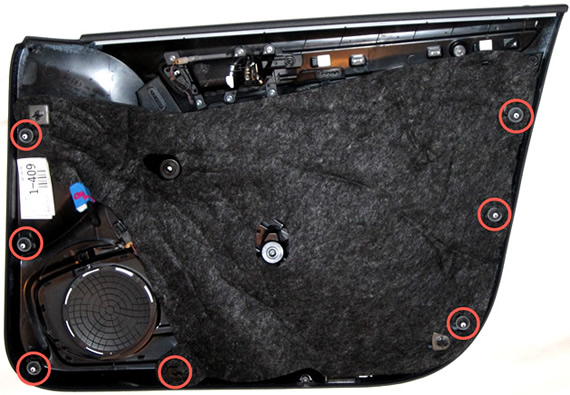
To unclip the door panel you have to start from the bottom and work your way up as the top of the door panel hooks over the door. The proper way to do this would be to use a trim tool and slide under each clip and release it. The DIY way is really just grab the pocket at the bottom of the door near the door edge and give it a good yank. That will get it started. You can then get your hand under the panel and pull the panel forward releasing each of the clips. I broke one clip out of both doors and it may have been do the cold weather I was working. I still recommend you buy a couple replacement so you don't have to worry about breaking one.
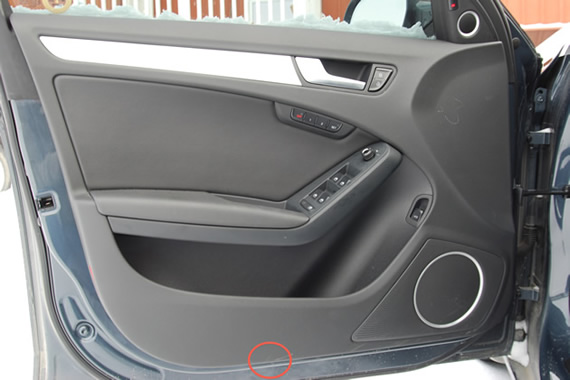
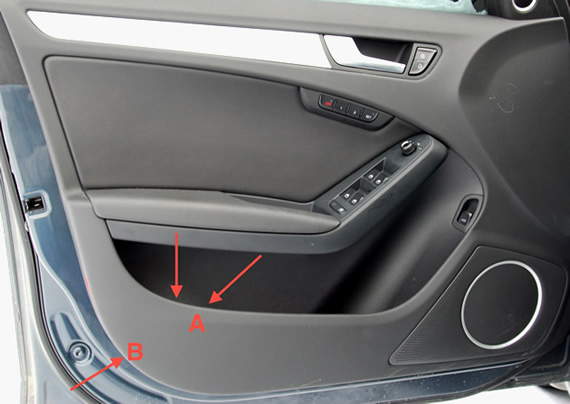
So as I mentioned above, if you don't have trim tools pull firm and fast at location A, almost in a snapping motion. I think of clips as band aids quick and sharp. Once the corner of the door is lifted put your hands under the panel at B and just repeat the action until all the clips are released.
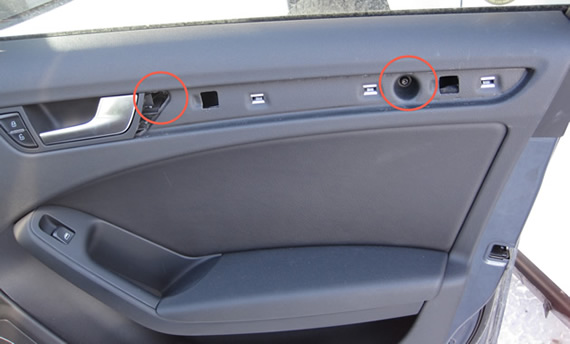
Once the door is unclipped lift it up and slowly pull it away from the door but do not pull to far. It is still attached with one plug to the controller and the door handle release cable.
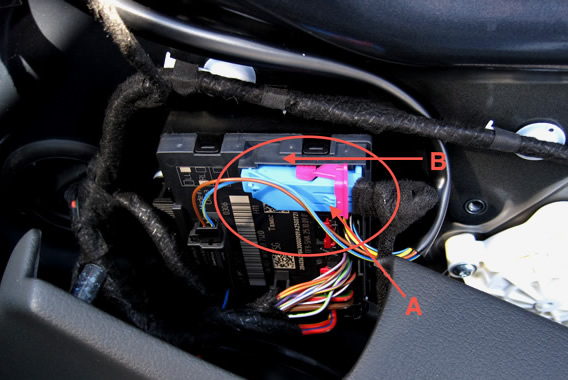
The plug you are looking to release is the large Blue one. You need to press the button down at position A and then flip the leaver up and back in the direction shown at B.
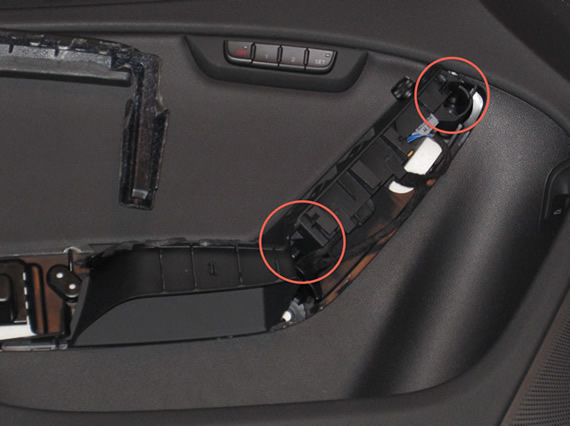
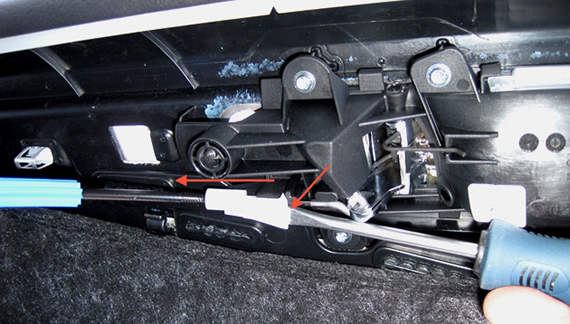
The next step is to remove the door handle cable. You will need a slot screwdriver to release the clip.This is the last step to remove the door panel.
The clip at position A is the one that has to be released before you can remove the hook from the door handle. The right side of the clip hooks over it's black holder that you see it routed through.
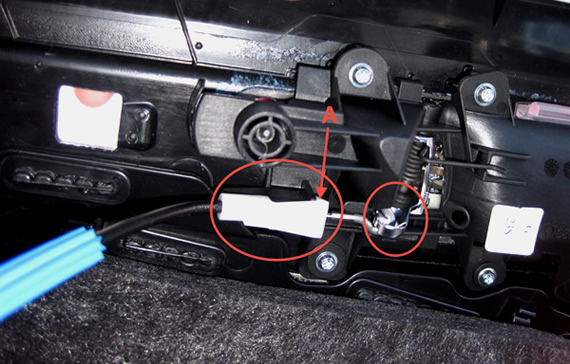
To release the clip take a screwdriver and pry the end of the clip up until it clears the black holder. You then pry the clip in the direction of the arrow shown and the clip will slide back releasing the cable from the door panel allowing you to get the slack you need to unhook it.
Now that the door panel is off lets install the switch.
Please note: AudiEnthusiast.com is in no way associated to Audi or VW in any way shape or form. All brand names and manufacturers listed here are for informational purposes only and are in no way endorsed by AudiEnthusiasts.com unless stated other wise.
WARNING!! All modifications and changes are done at your own risk. This site in no way approves the modifications performed here for your vehicle. Please check with your dealer before performing any changes as they may void portions of your factory warranty.