.: Ambient Door Pocket Lighting
This page will review the full ambient lighting installation version.
Rear Door Wiring
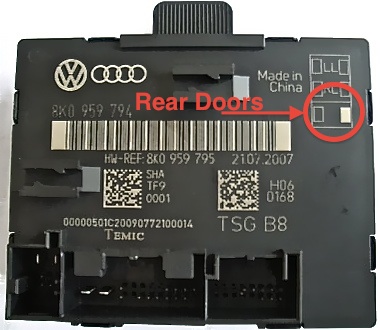
The same stands true for determining your rear module compatibility as the front. If you have a half shaded box you will most likely have to replace your modules to control the lights with the Ambient lighting.
Here is an example of a compatible module:
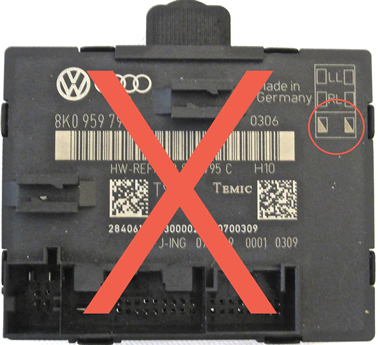
Some modules have the same part number for left and right sides. So although this module is not compatible you will see that it is marked for both sides of the vehicle.
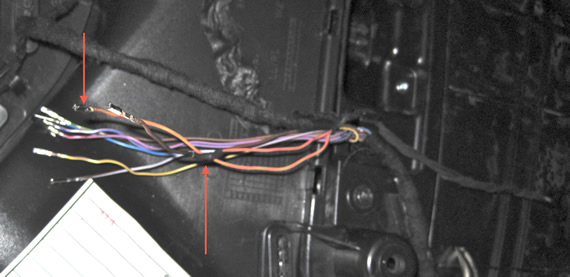
There isn't much different with the rear doors other than which plug and the number of wires in it. The nice thing with the rear doors is the wires you purchased are long enough without extending.
Rear doors use pin 3 of the 16 pin connector. If you don't have a pin in the module then your module is not compatible
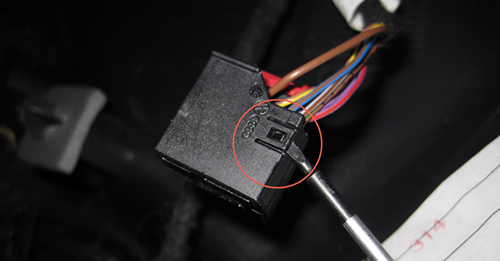
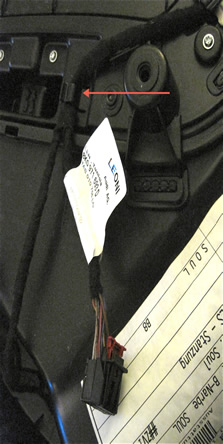
Before starting I unwrapped the tape to allow access to the ground and allow a cleaner install. I actually removed the plug completely to allow the removal of the factory tag so I could reassemble everything back to a stock look. Of course you don't have to go the lengths I do to make this look like a factory install.
The plug is in two parts. In order to insert the wires it needs to be separated. Use a small screw driver or something with a small edge to lift up the latch that holds the plug in place. Then pull the insert out. You can just pull the wires if you can't find something to hold onto.
If your using the Audi LED lights Wire #2 goes to the pin 3 of the module. Wire number 1 goes to ground.
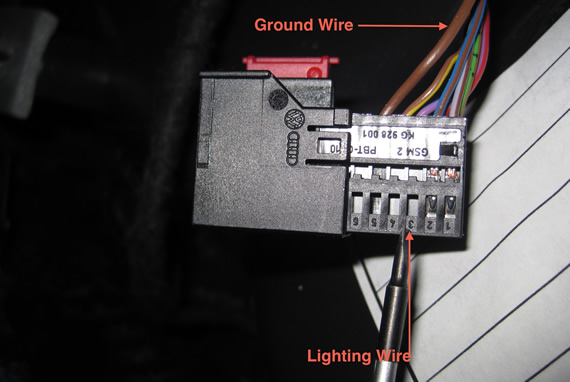
I spliced into the ground wire near the plug and covered it with the stock tape.
Here we can see the harness wrapped back up and where the plug goes through the door is hidden.
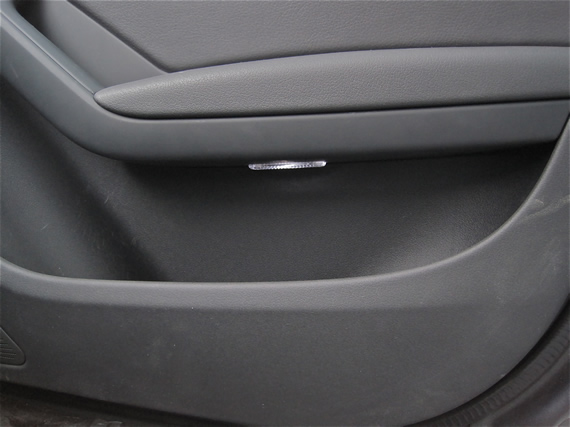
Once the wiring is complete reinstall the door panel and connect the light.
Pocket Lighting Coding for Ambient Lighting.
Probably the first step you should take is the coding. This will allow you to confirm your module is good to go and that way you can test each door as you put it back together. Note that these may already be selected depending on your car options.
Front Doors:
[ECU 42 and 52]
[Coding - 07] -> [Long Coding Helper]
-> Byte 1 Bit -> 1 Change 0 to 1
Or Check the box for “Ambient Lighting installed”
Here is a picture showing the module and items selected.
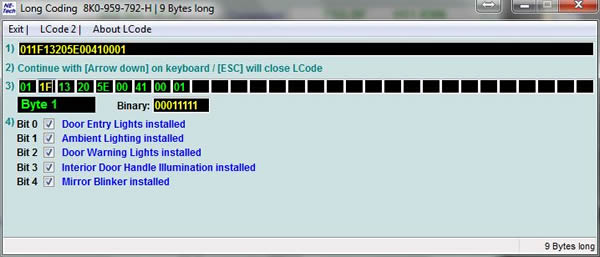
Rear Doors:
[ECU 62 and 72]
[Coding - 07] -> [Long Coding Helper]
-> Byte 1 Bit -> 1 Change 0 to 1
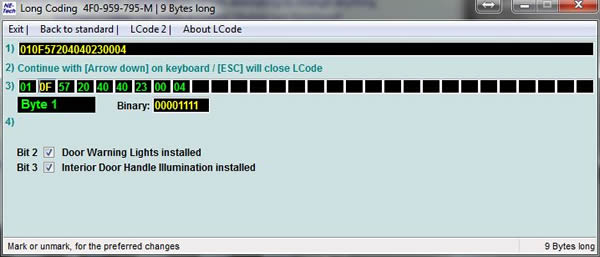
Since there is no check box you will have to change the bit manually. Go to the Binary box and make sure the second digit from the right equals 1.
Here is a picture showing the module and items selected.
Complete your coding and your all done.
Enjoy your new lights.
This showed how to install using factory lights and parts. If your looking for a less expensive way read on to see some alternate methods and coding.
Please note: AudiEnthusiast.com is in no way associated to Audi or VW in any way shape or form. All brand names and manufacturers listed here are for informational purposes only and are in no way endorsed by AudiEnthusiasts.com unless stated other wise.
WARNING!! All modifications and changes are done at your own risk. This site in no way approves the modifications performed here for your vehicle. Please check with your dealer before performing any changes as they may void portions of your factory warranty.