.: MMI Region Change
Purpose: The purpose of this document is to dump and share my and the original Authors knowledge that has been gained by experimenting and spending countless hours and many nights trying to reverse engineer my MMI units.
Scope: This page will cover Changing Regions on the MMI. You will require specific firmware for your new region as well as Maps for the region you are changing to. NOTE this will not correct any variances in the radio frequencies. Radios have to be done separately and not with software.
Objective: This page is intended to provide the AudiEnthusiasts a general knowledge in MMI Region changes, with the aim to help in-house projects to be more entertaining and successful.
Cost: This information is provided for free, however, donations to the original author (Keldo at Keldo . com) or this site as a token of appreciation is not a bad idea.
**Note. There is a mixture of 3G and 3G Plus images so don't be alarmed if your image is not identical to what you see on the screen.
Step |
Instructions |
|
| 1 | Switch on the MMI 3G. |
|
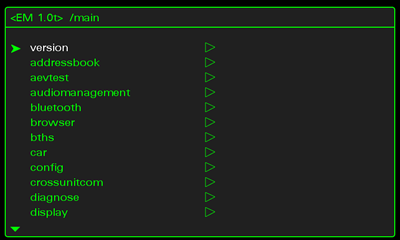
| 2 | Enter the green menu: |
|
| 3 | Green menu comes up |
|
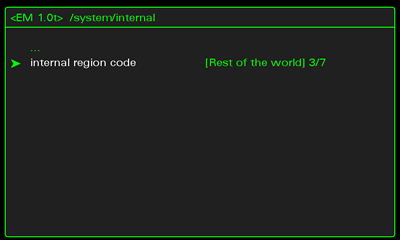
| 4 | Go to System -> Internal and change to "Rest of the world" and press return |
|
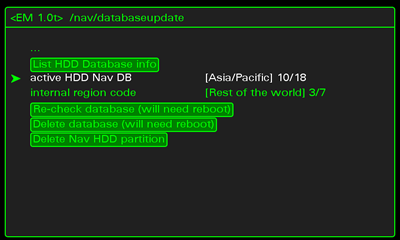
| 5 | Go to Nav -> databaseupdate And Change your "Active HDD Nav DB" to the region/country of your choice. |
1 - Unknown |
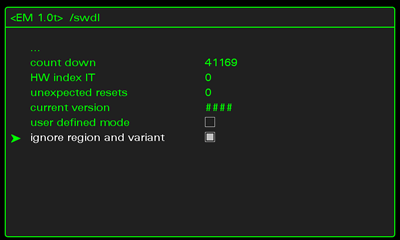
| 6 | Go to SWDL and tick "Ignore region and variant" and press return |
|
| 7 | Quit the green menu by pressing Navigation button (DO NOT exit by rebooting). |
|
| 8 | Insert the firmware update for the Region into the MMI unit slot SD1. |
|
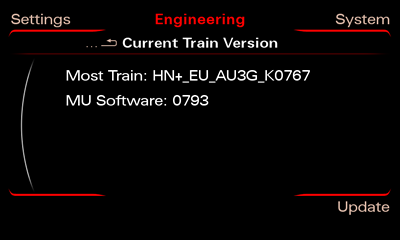
| 9 | Enter the Engineering menu. To do this first press Setup and Return (3G Plus use CAR and MENU) simultaneously and hold until the display changes. |
|
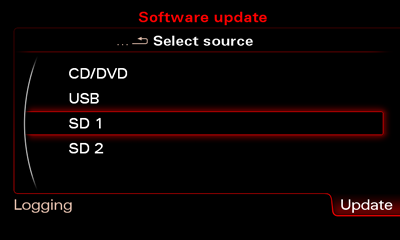
| 10 | Press Update |
|
| 11 | Choose SD 1
|
|
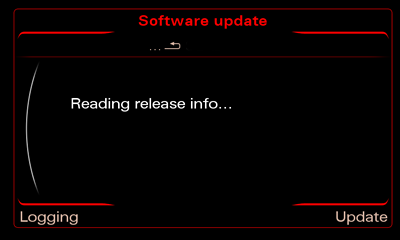
| 12 | Wait until reading is done.
|
|
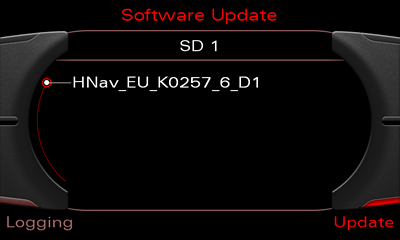
| 13 | Choose HNav_EU_KXXX_XX
|
|
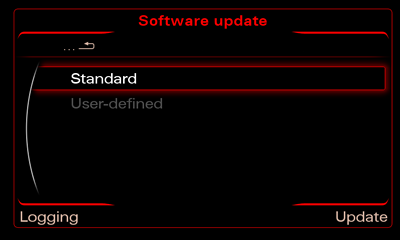
| 14 | Choose Standard
|
|
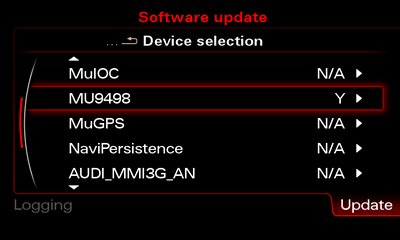
| 15 | Scroll down to the bottom of the list
|
|
NOTE: Ensure that there is no voltage changes of the vehicle's battery, i.e. don't Switch off and on anything, Don't open and close doors or windows etc... Diagnostic tests using the VCDS/other operations may not be performed in parallel. Switch off all unnecessary electrical equipment (auto/daytime running lights, air-conditioning etc.) in the vehicle and leave it switched off throughout the update. |
||
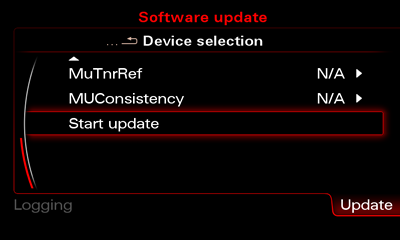
| 16 | Press "Start download" ("Start update" for 3G Plus) and then "Start"
|
|
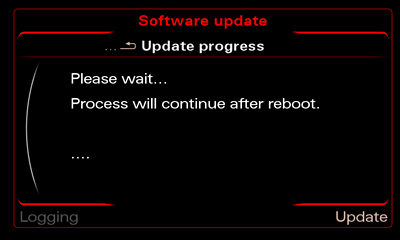
| 17 | Please wait... Once the system has rebooted, the download application may show a screen that displays the update progress of various devices. As soon as all devices have registered with the upgrade application, the update process is activated and the progress is shown on screen. The system may reboot many times during the update and programming session. This is carried out completely automatically and does not require you to take any action. Once the system has rebooted, updating is continued and the "Download progress" screen is displayed many times.
|
|
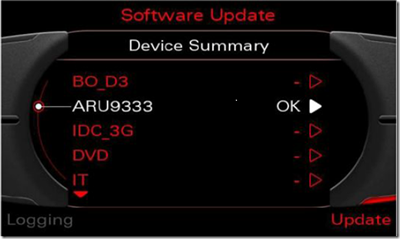
| 18 | Device Summary screen is displayed in the subsequent overview screen. |
|
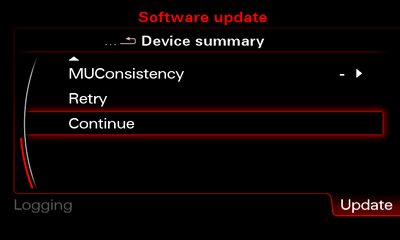
| 19 | Scroll down and select "Continue".
|
|
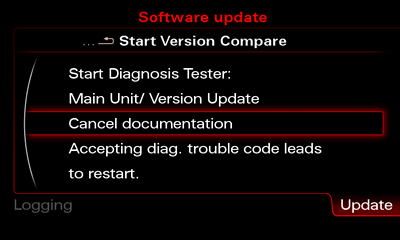
| 20 | Select Abort Documentation ("Cancel documentation" on 3G plus).
|
|
| 21 | Once MMI is rebooted for the final time, you're now ready for your Map Update. |
|

Please note: AudiEnthusiast.com is in no way associated to Audi or VW in any way shape or form. All brand names and manufacturers listed here are for informational purposes only and are in no way endorsed by AudiEnthusiasts.com unless stated other wise.
WARNING!! All modifications and changes are done at your own risk. This site in no way approves the modifications performed here for your vehicle. Please check with your dealer before performing any changes as they may void portions of your factory warranty.