.: Door Lock Upgrade
Please do some basic checks before beginning. Like making sure that the pins you need for this install are in the module. So far it seems all of our modules are interchangeable so I have no reason to believe that a module is not capable of operating locks. As the saying goes though, better safe than sorry.
Since you are working with wires all the same colour you have to be careful to hook them up one at a time. Now as luck would have it, the wires are long enough without cutting or extending to work for the back doors. If your doing a front door you may have to extend the wire. At the time of writing I didn't have a front door panel off to verify.
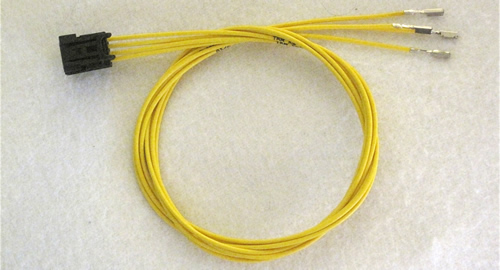
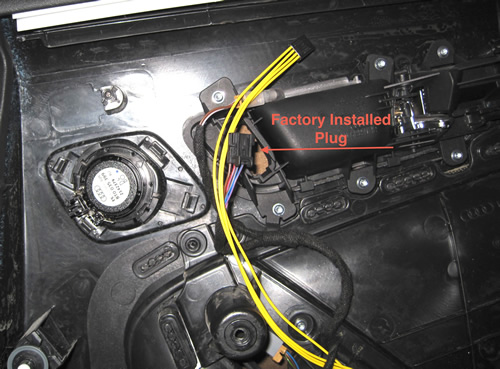
Your first step could be to assemble the wires into the new plug so you have your harness ready to go. When you go to connect your ground wire you will cut the wire so you can use the pin on your next plug so leave yourself some wire to extend or run to the location you choose for grounding.
Pin out for the rear doors, this will be written so it's coming from the 4 pin connector of the switch to the module.
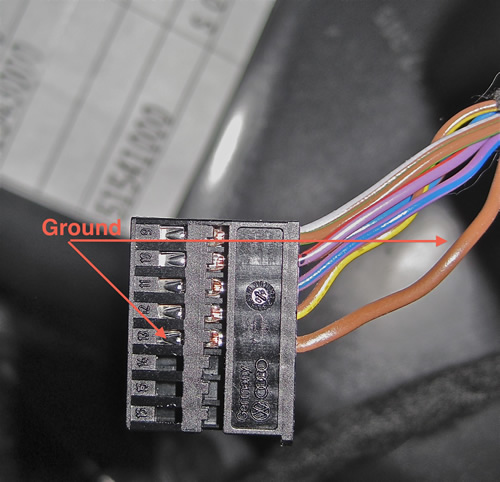
Pin 1 to ground. You can either tap the ground wire from the door illumination light (Brown Wire) or tap it into pin 13 of the module connector. There will be a ground wire already in place.
Pin 2 to Pin 10 - of the module (factory colour Purple/Red if installed)
Pin 3 to Pin 2 - of the module (factory colour Blue/Brown if installed)
Pin 4 to Pin 11 - of the module (factory colour of Purple/Blue if installed)
Rear Door Plug disassembly:
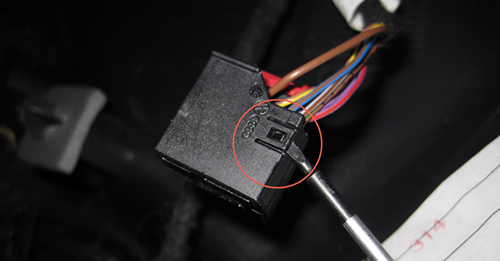
The plug is in two parts. In order to insert the wires it needs to be separated. Use a small screw driver or something with a small edge to lift up the latch that holds the plug in place. Then pull the insert out. You can just pull the wires if you can't find something to hold onto.
Grounding Choices:
Ground wire at door illumination light.
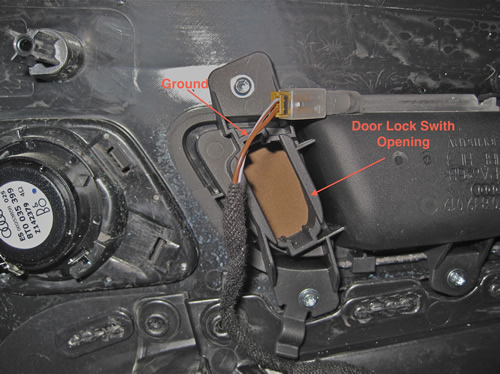
Ground wire directly at the plug
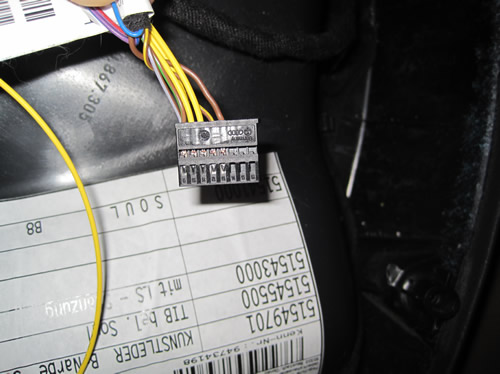
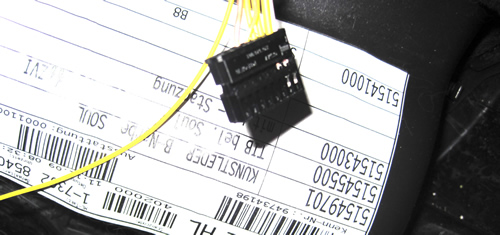
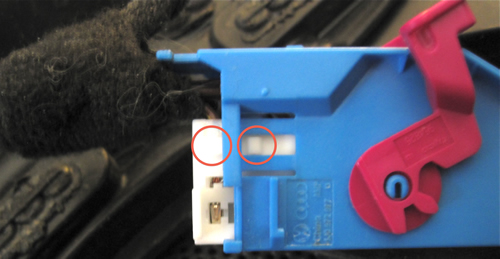
Here are a couple of pictures of the wires inserted into the factory plug the loose wire you see in the pictures is the ground wire not yet terminated. Since I didn't actually do this install I didn't complete any permanent wiring.
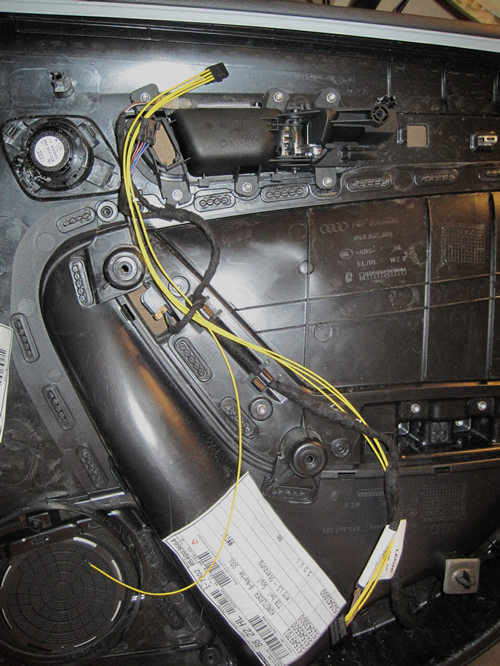
An overview of how the harness will look before wrapping with tape.
Here you can see the difference in length between the factory plug and what this retrofitted one would be. Not a big difference and certainly not worth reducing the length.
To finish up simply wrap your new harness up connect your ground and plug in your new switch.
Front doors. Please note I used the manual to get these pins so please double check your work if you can as you install. Since I can't confirm factory wire colour first hand I am not listing them. These go to the 32 pin connector from the front door.
Pin 1 to ground. You can either tap the ground wire from the door illumination light (Brown Wire) or tap it into pin 30 of the module connector. There will be a ground wire already in place.
Pin 2 to Pin 28 - of the module
Pin 3 to Pin 4 - of the module
Pin 4 to Pin 13 - of the module
Front Door plug disassembly:
The plug is in two parts. In order to insert the wires it needs to be separated. Use a small screw driver or something with a small edge to lift up the latch that holds the plug in place. Use the small tab to pull the plug out.

Note that there are 2 stops you have to go past before you can freely pull the plug out.
The rest of the front door installtion is the same as the rear.
As per every project.. OFF TO THE CODING!!!
Please note: AudiEnthusiast.com is in no way associated to Audi or VW in any way shape or form. All brand names and manufacturers listed here are for informational purposes only and are in no way endorsed by AudiEnthusiasts.com unless stated other wise.
WARNING!! All modifications and changes are done at your own risk. This site in no way approves the modifications performed here for your vehicle. Please check with your dealer before performing any changes as they may void portions of your factory warranty.