.: Glovebox Cooler
Something the A4/A5 is lacking for some reason. My passat had 2!!! One in the glove compartment and one in the centre console. Now Audi did plan on having this in car but never went forward. There where even instructions in their workshop guide on how to repair it.
Luckily for us one of our sister cars did get it, the Q5. Since the Q5 is nothing more than a bigger A4/A5 sharing a lot of the same parts and most of the same modules we are in luck.
You will have to double check your main blower housing unit to confirm you can install this but on all that have checked the hole was there for this and just had a twist out plug. The rumor is early 2008 model Audi B8's would need a new housing but I don't have any information to back that claim. Better safe than sorry even though this is one of the cheapest upgrades you can do on your car.
This is not a very difficult install although the glovebox can be a pain to get back in sometimes.
A fairly easy modification so I would rate it 5 out of 10 for difficulty.
Tools:
8MM Socket with small rachet or handle.
Box Cutter
Dremel
Sharpie
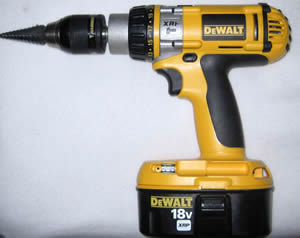
Drill and large drill bit or stepped drill bit.
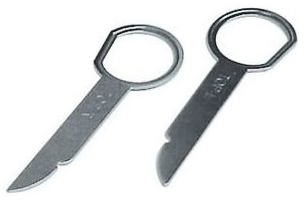
Radio Keys (only for pre 2010 with AMI or Post 2010 with CD changer in glove box.
Radio Keys:
Parts:
Glove box cooler valve:
3B0 816 355 01C
Cooler hose:
(LHD) 8R1 816 311
(RHD) 8R2 816 311
Picture of the main parts needed.
New Blower housing, may only be needed on some early 2008 vehicles.
(LHD) 8K1 820 356 B
(RHD) 8K2 820 356 B
Painters Tape
The Install
First step is to remove the glovebox. This can be done with just the socket although having a small screwdriver or trim tool makes it easier to get the side fuse panel cover off. If you have a pre 2010 with AMI or a glove box CD changer you will need to remove that with the radio keys before you start.
There will be two small slits in the front cover or the AMI/CD changer. You insert your radio keys into the slots and pull out the unit. Important to not that if your keys aren't marked the flat side of the key is on the outside. You can get keys just about anywhere and generally pretty cheap on ebay for less than $5.00. Just don't be to cheap or you'll end up with a set that gets stuck or doesn't work right. Once the unit is out disconnect the power and Fiber and put the unit aside. AMI and CD changer use the same connections. To release the radio keys press on the metal bands on the side of the unit and pull the keys out. If you are using incorrect sized keys or poorly made ones you may have to work the keys back out.
Remove all your items from the glovebox then remove the side fuse cover panel. Just in case you didn't know there is in fact a fuse panel on each side of the dash behind the end covers. I'll be using some RHD pictures so don't let them confuse you. Your working on the passenger side of the car regardless of where you are in the world.
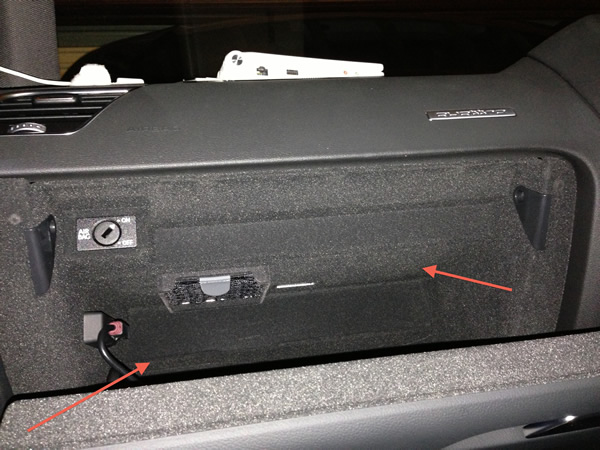
So remove the cover and the bolt shown in the picture. It's in the same position regardless of RHD/LHD.

Remove the the two bolts located under the glovebox. Doing them in this order will make it easier for you to remove the glovebox with as little strain on the attachment points as possible. They are located in approximately the same spot on each side. This picture doesn't show both but they aren't hard to find. Note the grey cover that attaches to the back of the glovebox has some plastic turn clips in them. If you need to release that part thats how you do it. It's also the panel that allows you to get to your cabin filter if memory serves me.
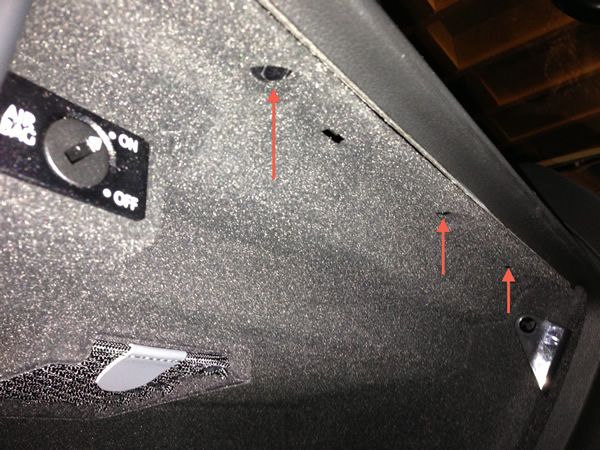
Now remove the two bolts from inside the glove box. The don't show in the picture but I've marked the approximate locations. Be prepared to support the glove box as there are only a few bolts left after these.
The last bolts are 3 bolts along the front edge of the glove box. and you can run your finger along to find them fairly easily.
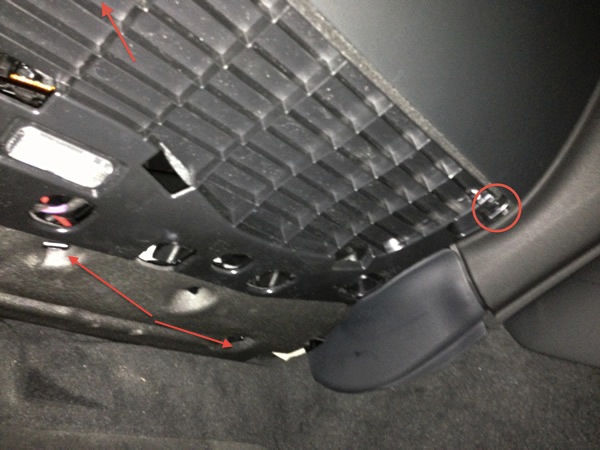
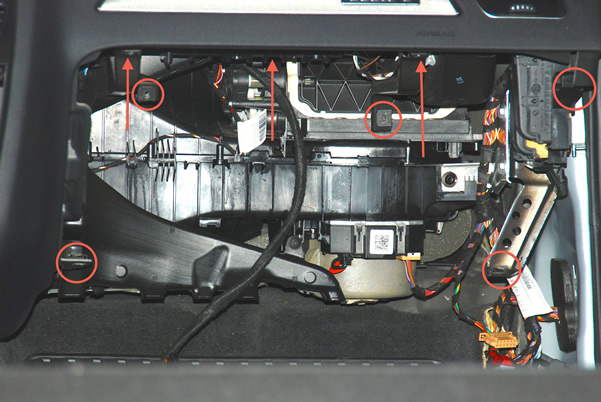
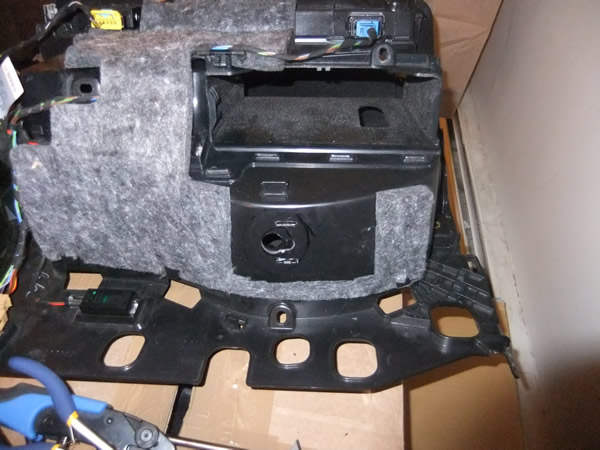
I know how difficult it can be to visualize the bolts from the pictures. So I have a picture here that shows the glove box removed and all the mounting points marked.
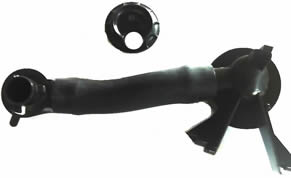
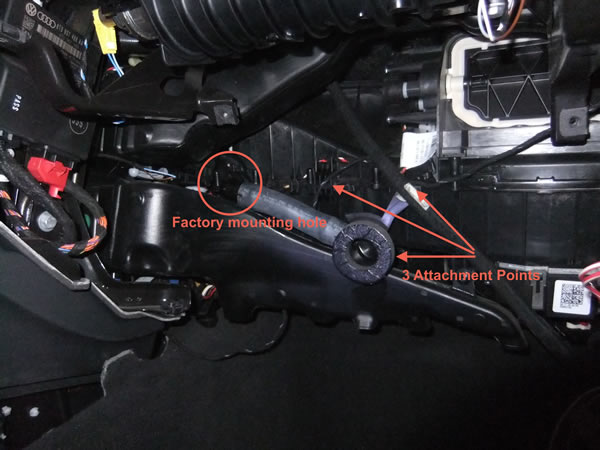
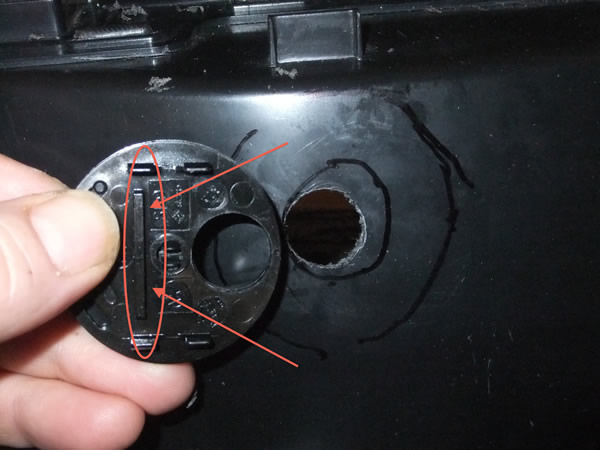
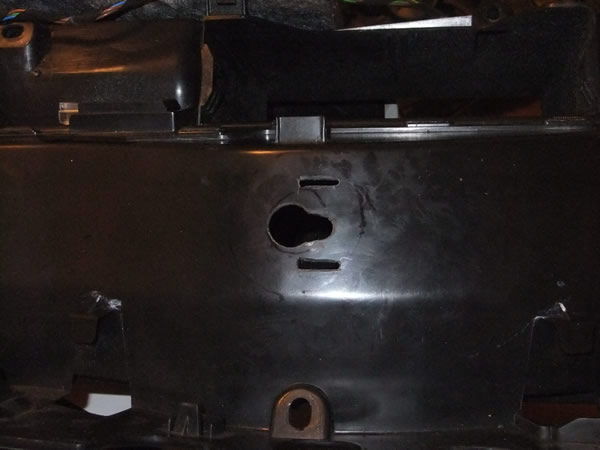
Once you get the glove box out you can check your heater unit and make sure you have the spot for the cooler hose. In this picture you can see the plug/cover. To Verify just remove the cover and make sure you have a hole behind it, It just twists out. As long as you have the cover I would bet you can just drill a hole to make it work.
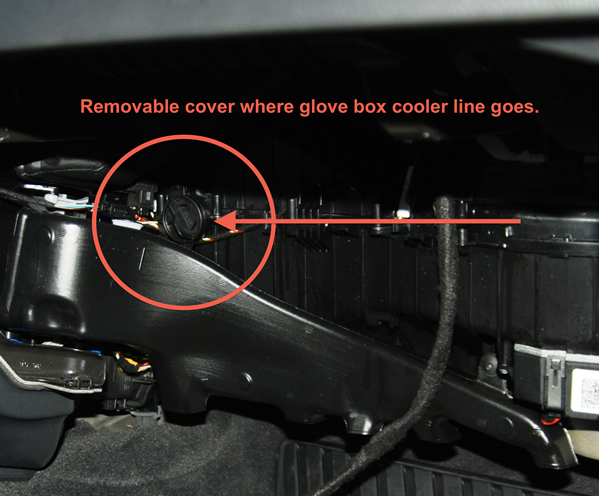
Looking at this picture you can get a better idea of where the hose goes. It has a total of 3 attachment points that it clips into. There isn't much more to installing this part.
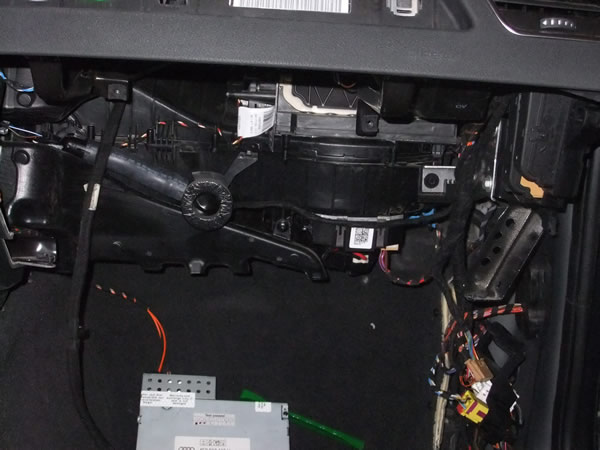
Mounted in place:
Now the hard part begins. If you have insulation on your glovebox like I do I would recommend removing it for the time being.
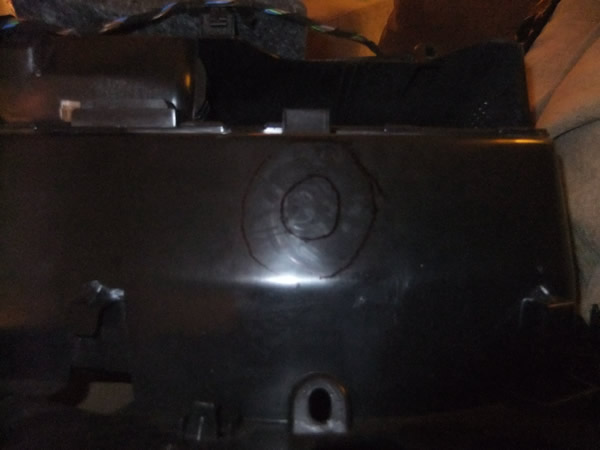
What I did at this point was put some sort of marking fluid on the circle of the hose. I then pushed the glovebox back into place (without bolting it in) then removed it and found the marks from the hose. I had to try it a couple of times to get a basic idea of where it needed to be. There is some room for error on this as the hole in the hose is bigger than the hole in the plastic cover/valve.
Once I had an idea I removed the hose and used it to trace out a rough circle on the glove box.
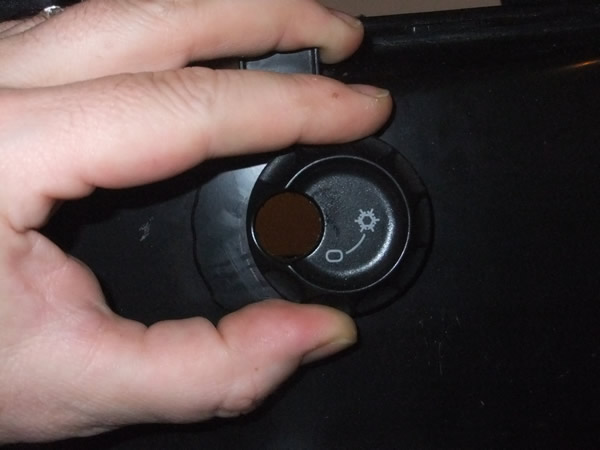
I then drilled out the hole in the center using the vent cover as a template for the size.
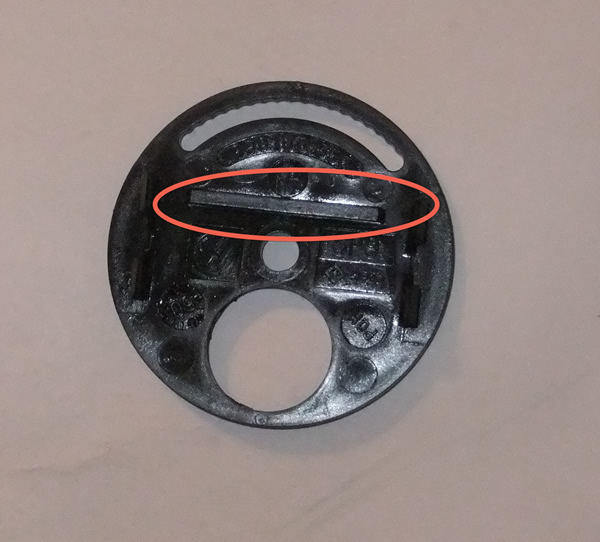
Now there was one long protruding part of the valve cover that didn't seem to be worth cutting out. It would have meant a lot more work and I couldn't see how it would effect the operation of the valve so I removed it. I just used a box cutter. I'll show the part to remove in the pictures below.
The Method, it only took about 2-3 minutes to strip it down.
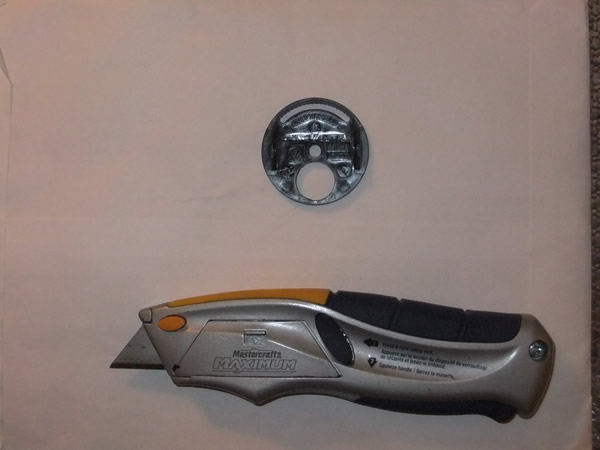
Finished:
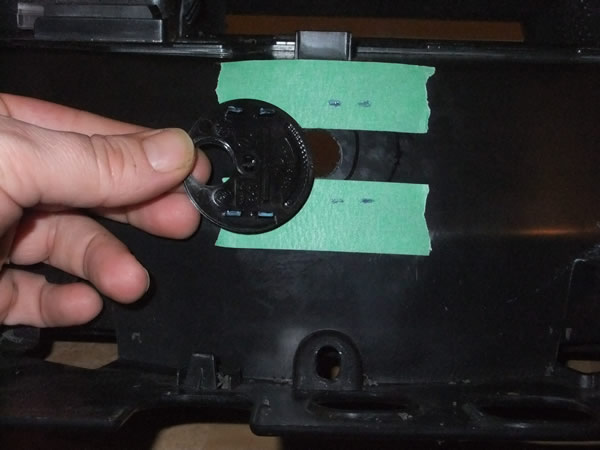
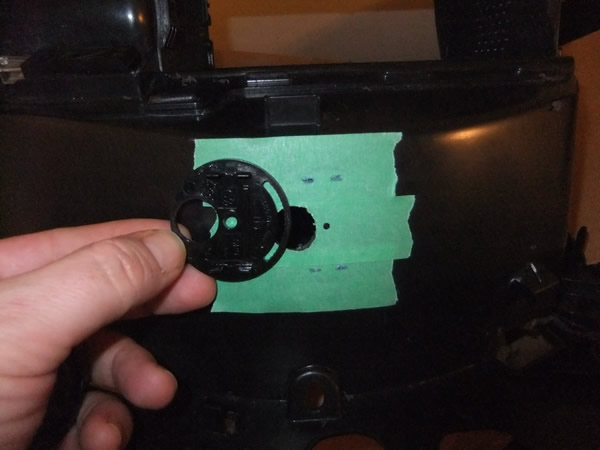
My next step was to mark the holes for the mounts of the cover. I placed some tape on box then put some marker paint on the edges of the cover and pressed it into the tape. You can use a number of methods for this including just putting a couple layers of tape and leaving indents.
The 4 mounting clips:
Then the Center mount:
With everything marked I used a combination of a dremel/drill and and box cutter to cut out the openings. I think you can tell from the drill bit on the drill it made getting the holes done fairly quick and easy. Like most things cut a little test, cut a little, test..... It can be tedious but less chance of making a mistake and cutting to much. There is a little room for error but not to much.
Here we can see the holes cut out. It was easier to make a smaller hole next to the large one for the pivot point of the valve cover. Now of course this could be done better or more precise but I think the overall finish of the cut works well.
From the Inside:
From the outside:
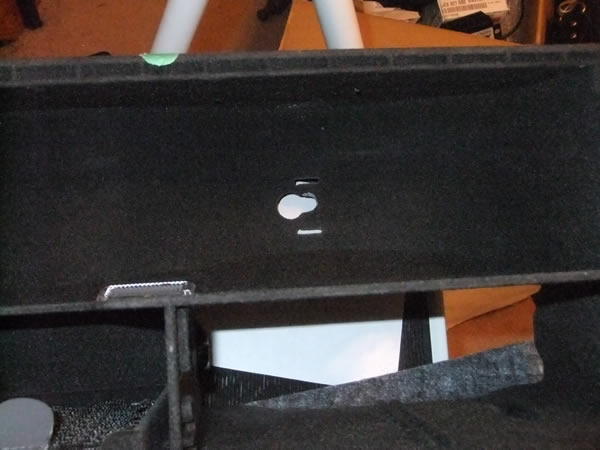
I wanted to make sure when I was installing the glove box there was enough room for the tube to slide into place without catching the insulation. Here is the glove box with the insulation in place and cut:
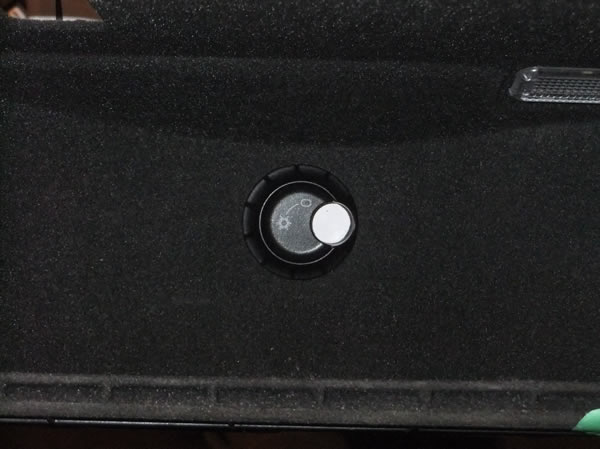
Here you can see a picture of the valve open (I placed a piece of paper behind the glove box to show it better.
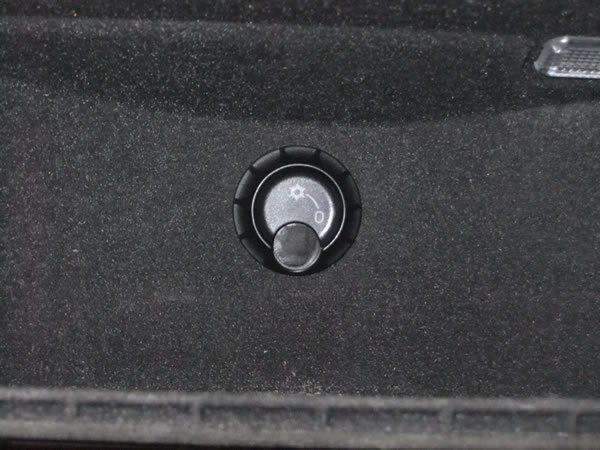
Here is a picture of it closed.
That is it for the mod other than installing your glovebox. Now the next time your out in the heat and you want to keep some water, or chocolate or anything else cool you will have a place to put it. Just remember to keep the AC on and don't forget in the winter time it becomes a heater instead of a cooler.
Enjoy.
Please note: AudiEnthusiast.com is in no way associated to Audi or VW in any way shape or form. All brand names and manufacturers listed here are for informational purposes only and are in no way endorsed by AudiEnthusiasts.com unless stated other wise.
WARNING!! All modifications and changes are done at your own risk. This site in no way approves the modifications performed here for your vehicle. Please check with your dealer before performing any changes as they may void portions of your factory warranty.