.: Tweeter Install
Parts:
2 - 8T0 035 399B – B&O Tweeter for front door “pillar”
2 - 4B0 971 832 – Flat contact housing for tweeter (i.e. “Plug”)
2 - 000 989 009 E – Wires for Plug
Speaker Grills:
You have some options here, you can use your existing grills and drill out the small holes or buy yourself a set to work with. The factory non B&O trim is really inexpensive so that would be your best route so your car isn't apart while you work on them. You also have the option of buying the factory grills. Keeping in mind that the factory trim for the B&O speakers cost more than the tweeters themselves.
Options :
1) B&O version:
Right: 8K0 035 424 A 4PK
Left: 8K0 035 423 A 4PK
2) Standard version
Right: 8K0 035 424 4PK,
Left:8K0 035 424 4PK
3) Use existing set
Capacitors:
NOT NEEDED, after inspecting the B&O tweeter I discovered there is one already built into the tweeter.
Misc Supplies:
These may very depending on the your choice of installation method.
Friction tape
16-ga wire
electrical tape
solder
4 - 14-18 gauge “T-splice” connectors
Shrink wrap tubing
The Install:
Now that the door panel is off the rest is fairly straight forward assembly. Chances are you would have the harness ready to go for when the door panel was removed so this should be the quick part for you.
Prepare Harness:Take one of the wires and insert both ends into the connector. You can then cut the wire in half leaving you with 2 wires.
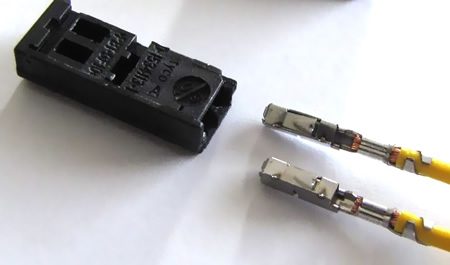
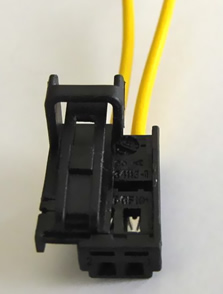
Once the wires are in you take the second part of the connector and slide the wire lock onto the main connector:
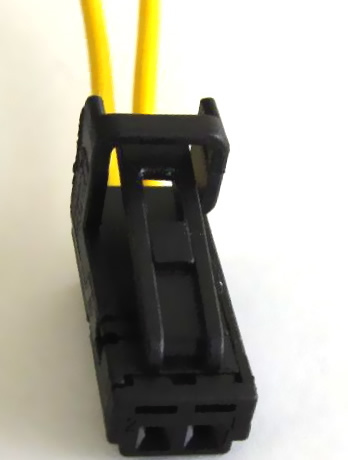
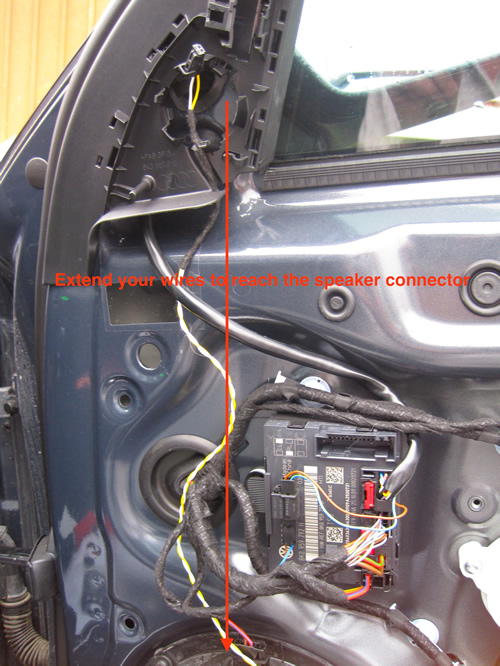
Before you proceed an further you will need to test fit the harness so you can adjust the lengths as needed to reach the door speaker. :
The Positive side (which contains the built in capacitor) will attach to pin number 2. If you turn the connector over and look on the bottom you will see the pin numbers listed.


Now with a lot of these installs how you choose to connect and wrap your wires is subjective and up to you. I personally use shrink wrap on all connections after soldering them and some choose to to tape them, you can even use liquid electrical tape if you have it. The same goes for splicing wires together. Some will choose to solder and some to use quick connectors.
Once your harness is built you will need to connect it to the speaker wires on the door speaker. Keep in mind that the line is polarity sensitive so make sure you connect the wires accordingly.
The colour of the wires may alter so make sure you verify your connecting to pin 2. In the example shown the wire is Red with a Blue stripe but I have see the reverse.
*Note: Pin 2 is the positive side of all the speakers*

Once your connections are complete you can install the tweeter and neaten up your wiring.
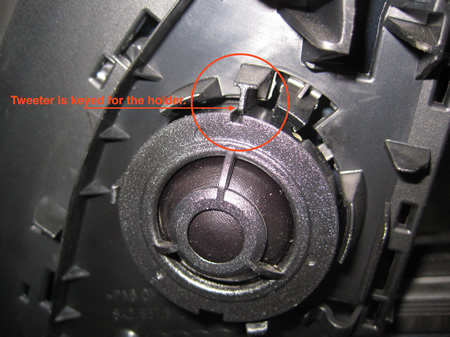
The tweeter is keyed and will only install properly in one way.
Now if you opted to buy they B&O trim your done and all you have to do it put the door back together. If you've opted to reuse your factory grills then we continue on.
Take one of the tweeters and a pencil and outline the area where the tweeter will be situated:

The next step is to take your favourite drill and start using it to drill out the holes in the honeycomb. Keep in mind that you do not have enlarge to the full diameter of the tweeter.
Here is a picture of one almost completed:
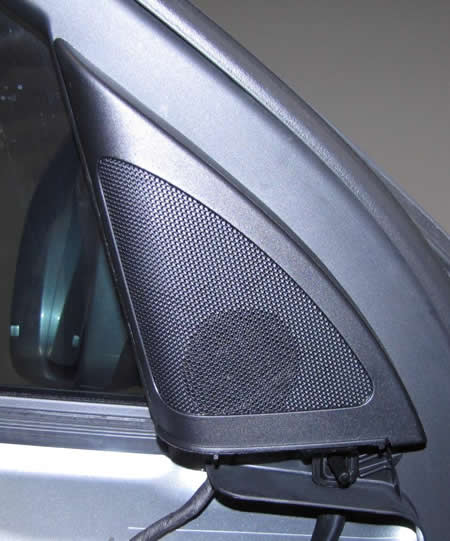
There you go. A little bit more sound out of your standard system.
Please note: AudiEnthusiast.com is in no way associated to Audi or VW in any way shape or form. All brand names and manufacturers listed here are for informational purposes only and are in no way endorsed by AudiEnthusiasts.com unless stated other wise.
WARNING!! All modifications and changes are done at your own risk. This site in no way approves the modifications performed here for your vehicle. Please check with your dealer before performing any changes as they may void portions of your factory warranty.