.: TPMS
Unfortunately at the time of writing most North American Cars did not come with a compatible ABS unit to enable certain features including TPMS and Automatic Hill Hold Assist (AHHA). So although I have not done these myself (yet) it is well documented and I am providing a more in depth re-write here so you can hopefully find all the information you require. I will include all the needed information here for the TPMS and a separate Project page for installing AHHA since I have actually attempted it but could not complete due to the ABS module.
If you do not find answers to specific questions here please go to the forums such as Audizine to seek help. Since I have not completed these I can not provide any more information beyond what's found on these pages.
There are two types of TPMS out there and this one is strictly for the non sensor type.
.: The Codes
Enable Tire Pressure Monitoring System (TPMS) (Only for specific cars)
Prerequisite:
The ABS unit exist in two versions:
1AT - ESP ready for TMPS
and Hill Hold
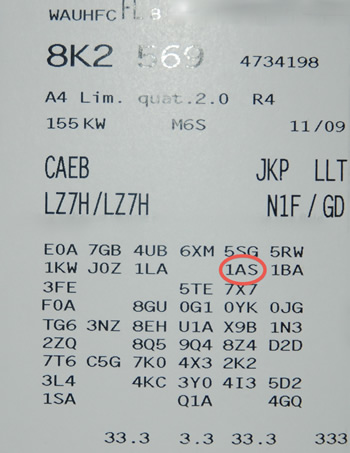
1AS - ESP not ready for TPMS and Hill Hold
These specific codes can be found in either your maintenance manual or in the trunk where the spare wheel is stored.
The sticker you are looking for looks like this:
Here is a listing I have compiled with the all the ABS modules I could find.
The following show as 1AT |
|
| Quattro | Front Wheel Drive |
| 8K0 614 517 BA 8K0 907 379 N |
8K0 614 517 AT 8K0 907 379 M |
| 8K0 614 517 BG 8K0 907 379 S |
8K0 614 517 BH 8K0 907 379 R |
| 8K0 614 517 BJ 8K0 907 379 S |
8K0 614 517 CB 8K0 907 379 AC |
| 8K0 614 517 CC 8K0 907 379 AD |
8K0 614 517 CK 8K0 907 379 AG |
| 8K0 614 517 CL 8K0 907 379 AH |
8K0 614 517 DM 8K0 907 379 AM |
| 8K0 614 517 DC 8K0 907 379 AN |
8K0 614 517 EB 8K0 907 379 BD |
| 8K0 614 517 EC 8K0 907 379 BE |
8K0 614 517 FM 8K0 907 379 BT |
| 8K0 614 517 FN 8K0 907 379 CA |
|
| The following show as compatible to 1AT and 1AS (may be questionable) | |
| 8K0 614 517 CN 8K0 907 379 AJ |
8K0 614 517 BM 8K0 907 379 T |
| K0 614 517 CJ 8K0 907 379 AH |
8K0 614 517 DG 8K0 907 379 AQ |
| *This may not be a complete list and I recommend you check compatibility before making a determination based on what you read here. | |
The following show as 1AS (not compatible) |
|
| Quattro | Front Wheel Drive |
| 8K0 614 517 AQ 8K0 907 379 L |
8K0 614 517 BD 8K0 907 379 P |
| 8K0 614 517 BE 8K0 907 379 Q |
8K0 614 517 BR 8K0 907 379 BP |
| 8K0 614 517 BS 8K0 907 379 AB |
8K0 614 517 CD 8K0 907 379 AE |
| 8K0 614 517 CE 8K0 907 379 AF |
8K0 614 517 CF 8K0 907 379 AE |
| 8K0 614 517 CS 8K0 907 379 CQ |
8K0 614 517 CR 8K0 907 379 AK |
| 8K0 614 517 DS 8K0 907 379 BC |
8K0 614 517 DR 8K0 907 379 BB |
| 8K0 614 517 AP 8K0 907 379 K |
|
| The following show as compatible to 1AT and 1AS (may be questionable) | |
| 8K0 614 517 CN 8K0 907 379 AJ |
8K0 614 517 BM 8K0 907 379 T |
| K0 614 517 CJ 8K0 907 379 AH |
8K0 614 517 DG 8K0 907 379 AQ |
| *This may not be a complete list and I recommend you check compatibility before making a determination based on what you read here. | |
The retrofit/enabling:
Enable the TPMS MMI item (the menu item will be greyed out - disabled for now):
MMI basic (non-MMI - 2G) (symphony/concert radio):
[56 - Radio]
[Coding - 07] -> Long Coding Helper -> Byte 8
Bit 6 0 to 1
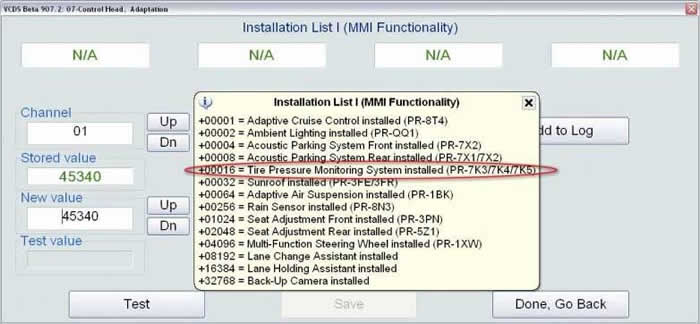
MMI high (MMI 2G):
[07 - Control Head]
[Adaptation - 10] -> Channel 01
add 16 to the existing value
MMI Plus (MMI 3G):
[5F - Information Electr.] Not know yet how to enable the TPMS menu item with VCDS.... You can however enabled it through the "hidden menu":
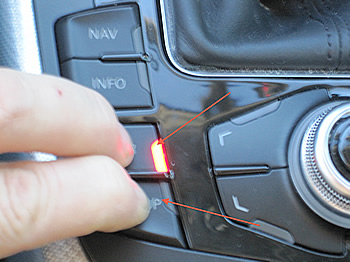
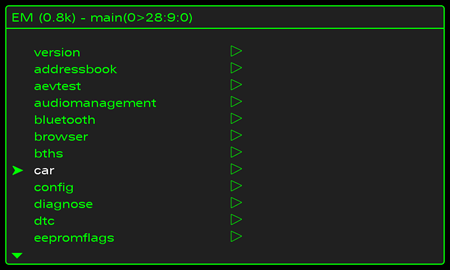
If you have not enabled the Hidden Menu yet go here
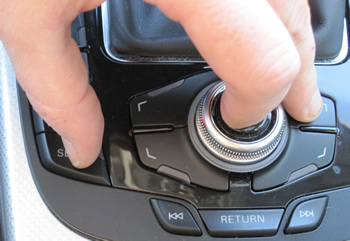
Enter Hidden Menu by holding down the these two buttons until you see the Hidden Menu:
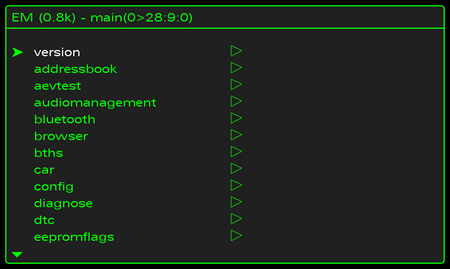
Select "car"
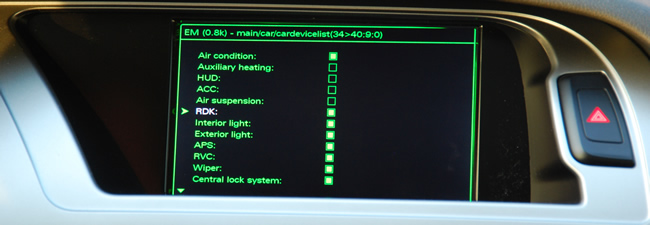
Select "cardevicelist"
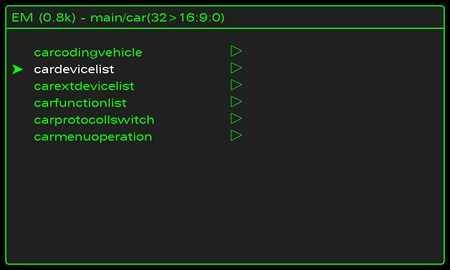
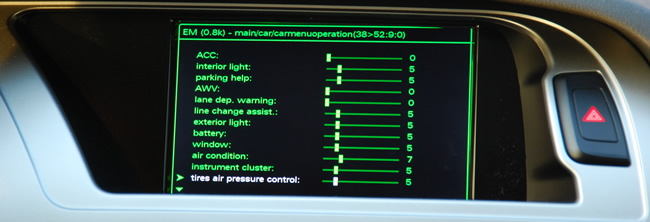
Press your return button then select "carmenuoperation'
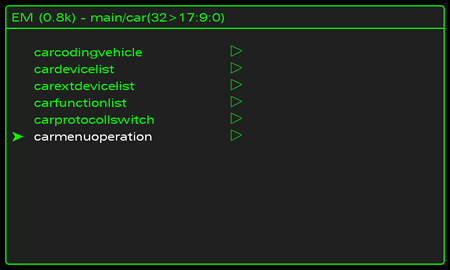
Scroll to "tires air pressure control" and press the scroll wheel. Now set it to 5 and hit the scroll wheel again.
Press return to go back you have completed the MMI setup.
Now reset the MMI. This is done by pushing down the Setup – Scroll Wheel and top right menu buttons at the same time. Press all three at the same time then release.
The next steps are to enable the TPMS in the ABS module and the Instrument cluster. Once these are done the connection to the MMI will be complete and you will be able to access the menu.
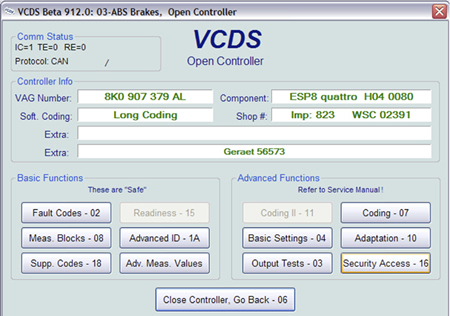
Step 1 Enable ABS Brake controller
[03 - ABS Brakes]

[Security Access - 16]
Enter Security Code
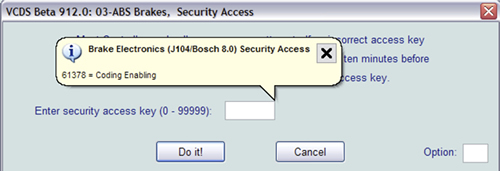
If your Security code was correct you'll get this screen:
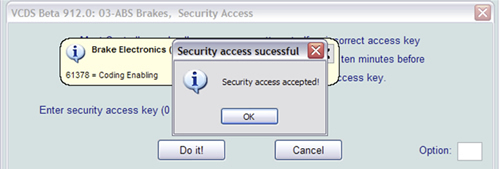
Select Ok and move onto the coding.
[Coding - 07]
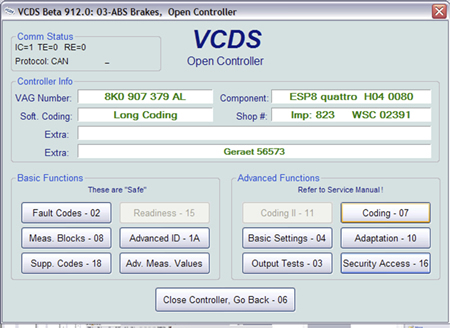
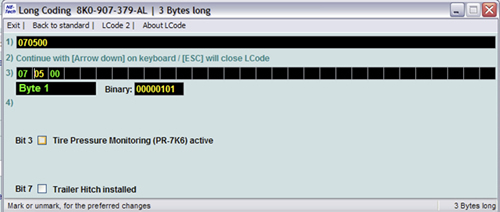
-> Long Coding Helper
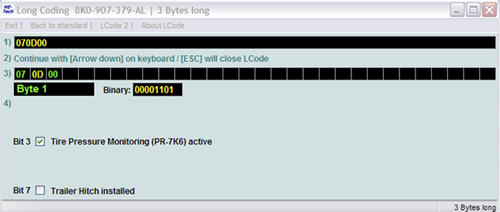
Set Byte 1
Bit 3 from 0 to 1 Or "check" Tire Pressure Monitoring (PR-7K6)
Before Coding
After Coding
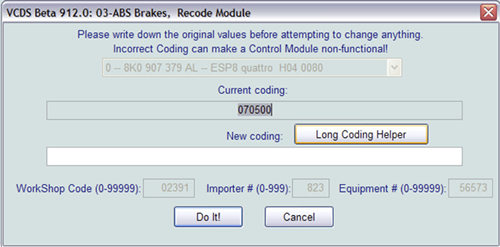
Once you completed the coding click Exit on the top left of the screen.
You will now be brought back to the long coding screen:
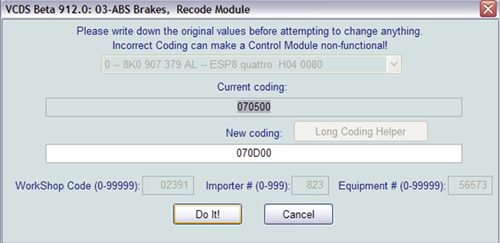
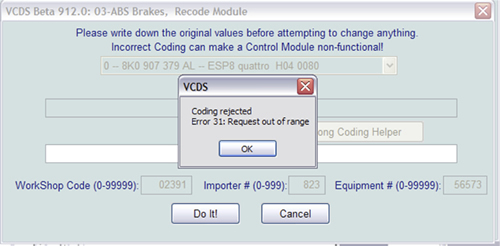
Select "Do It!" and you are complete the ABS coding. If the coding fails and you receive this message double check your coding. If it is correct your ABS module is not compatible with the TPMS and you'll need undo any other changes you have made.
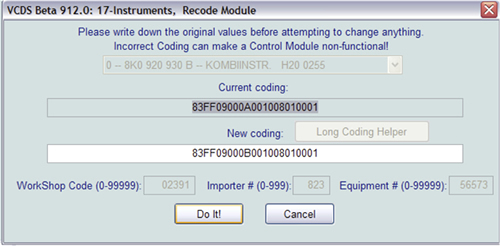
Your next step is to enable the TPMS in the Instrument Cluster:
Follow the same instructions as above without the security and go into module 17.
[17 - Instruments]
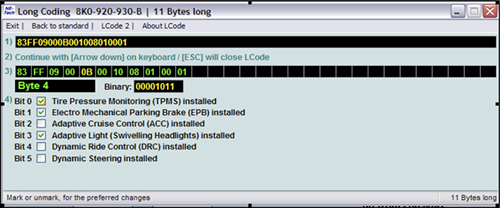
[Coding - 07] -> Long Coding Helper -> Byte 4
Bit 0 - Change 0 - 1
Or Select Tire Pressure Monitoring (TPMS) installed
Select Exit as you did above and choose "Do It!"
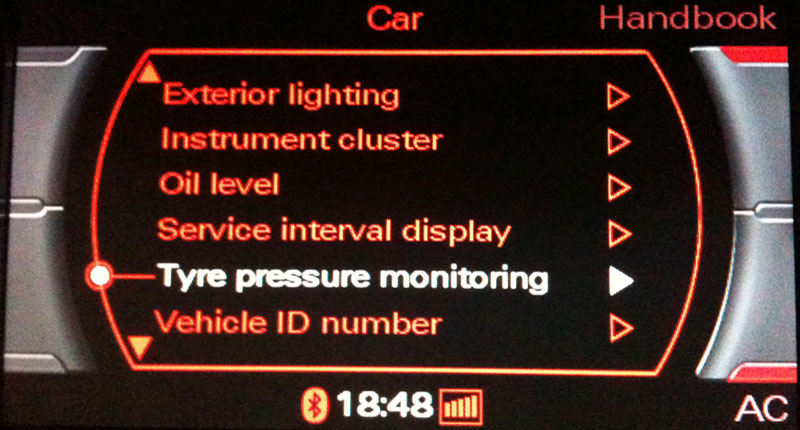
That's it, the main programming is now complete. Now you need to go into the menu in the MMI and confirm you tire pressure. It needs to be told that your current pressure is correct so you better check it before you confirm it.
Select the Tyre pressure monitoring menu
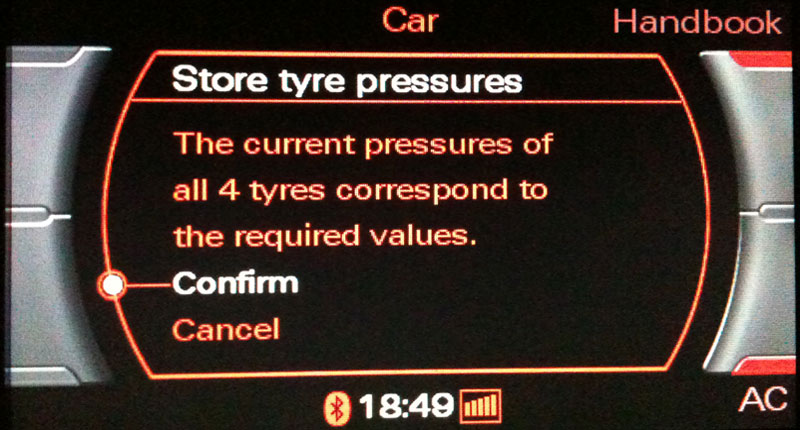
Select Store now provided you have confirmed your tire pressure prior.

Next you will be asked to confirm one more time.
The teach-in process:
The teach-in process is performed once after the SET key is pressed for the low tyre pressure indicator.
During the next trip, the control unit saves the measured wheel speeds and the vibration characteristics of the wheels in various vehicle operating states.
The vehicle operating states are basically defined by the following parameters: vehicle speed, steering angle, transverse acceleration and yaw velocity. These teach-in values subsequently make up the target data which is used for monitoring. After approximately 10 minutes of driving, it is already possible to detect a breakdown (rapid loss of pressure). Approximately 60 minutes of driving are required to detect diffusion loss (slow loss of pressure).
Testing the TPMS system:
Simply lower your tire pressure by a few pounds and take the car for a drive. It should detect the change within a few miles. Make sure you lower enough though a pound probably isn't going to trigger it.
Warning Displays:
*The displays are activated when the tyre pressure drops below an a coded minimum value. When system faults are detected, the yellow warning lamp is activated.
The following displays are possible:
* In the event of a rapid loss of pressure at a single wheel (tyre damage), the red warning lamp is activated. If the vehicle a driver information system, an additional text display appears indicating the position of the wheel affected.
* In case of slow loss of pressure, which occurs gradually at multiple wheels due to diffusion, the red warning lamp is also activated. In this case, the optional text display appears but no positional information is given.
Please note: AudiEnthusiast.com is in no way associated to Audi or VW in any way shape or form. All brand names and manufacturers listed here are for informational purposes only and are in no way endorsed by AudiEnthusiasts.com unless stated other wise.
WARNING!! All modifications and changes are done at your own risk. This site in no way approves the modifications performed here for your vehicle. Please check with your dealer before performing any changes as they may void portions of your factory warranty.